Selective on-demand drive imaging in UFS Explorer
The traditional drive imaging approach, adopted by most standard data recovery tools, tends to be highly ineffective in situations when the source drive shows signs of physical defects. Creating a complete image of a failing or unstable device can be time-consuming, placing additional strain on the degraded storage and increasing the risk of its further damage. Attempting to read data directly from a failing drive may be even more problematic due to the unpredictable behavior and fragile state of such devices. If the drive fails during the process, data recovery is likely to be incomplete or even absolutely unsuccessful.
UFS Explorer of the Professional and Technician editions solves this problem by enabling selective imaging of the data that is being accessed or requested by the user. Rather than copying the entire drive upfront, the software will create its disk image in real time. Each sector read from the source is immediately transferred to the target image file. Any further access to that sector is directed to the image rather than the original device. All relevant metadata and content are automatically imaged as the user navigates through the corresponding element of the file system. Additionally, users can define individual files for imaging, specific data ranges or the entire space occupied by the file system. This on-demand imaging technique reduces the load on the drive, minimizes the time and storage space consumed by the image and allows prioritizing the most critical data.
The functionality is implemented in the software via the "On-demand disk image" mode available in the disk imaging task configuration dialog.
To demonstrate it in operation, let’s consider a real-world example. We need to recover some crucial documents from a failing hard drive that constantly freezes and disconnects. Creating a full image of this drive would take hours, and the device is very likely to fail at some point. Our technician will attempt to access and quickly retrieve only the required files.
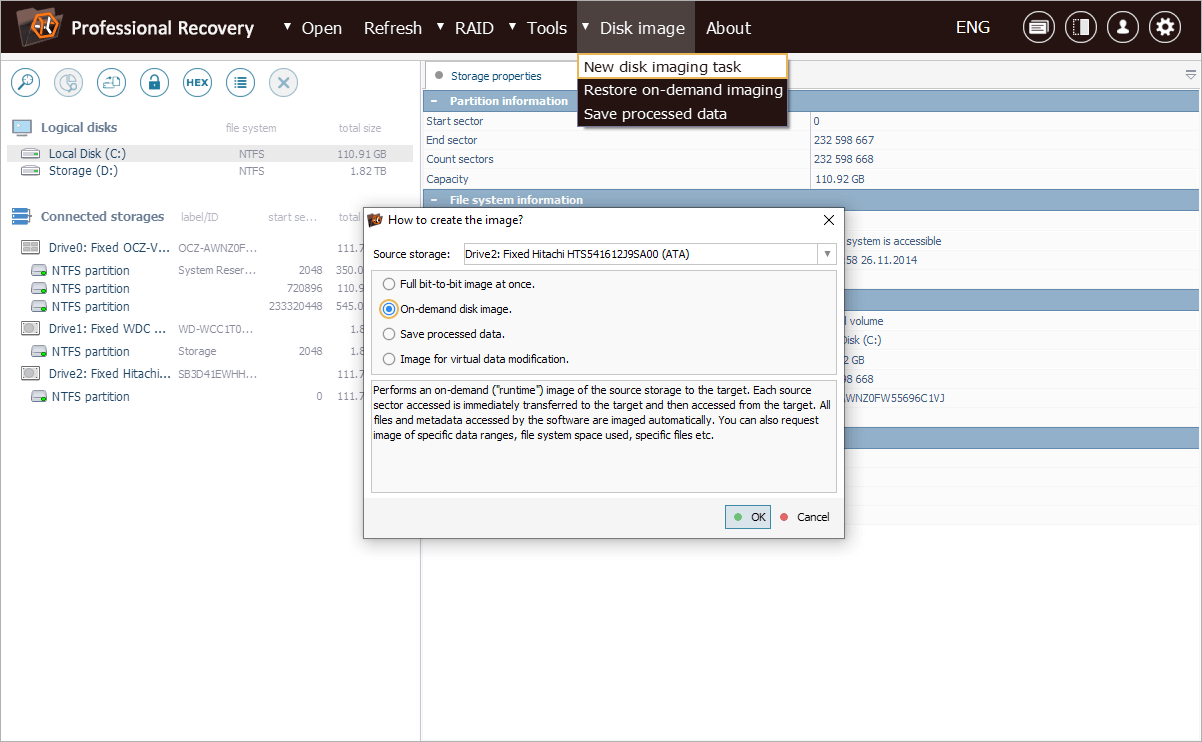
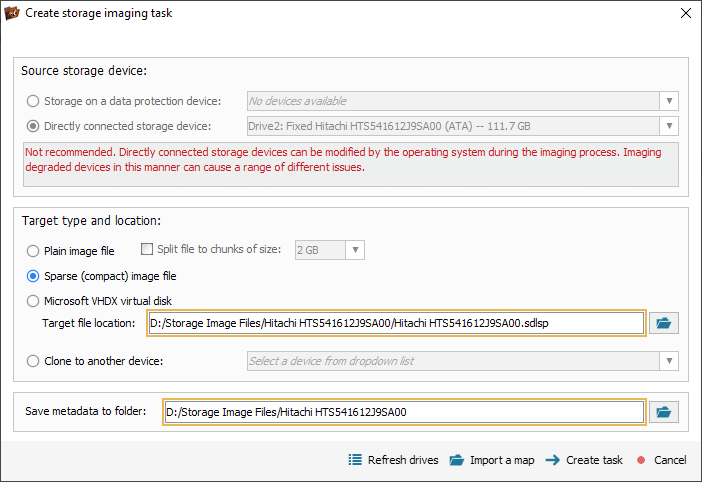
To begin with, we need to launch a new disk imaging task for the problem drive. For this, we go to the drive’s context menu and choose the "Save disk image" option.

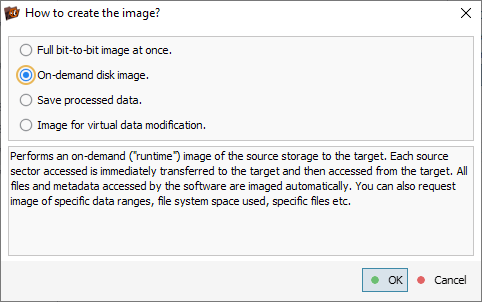
In the task configuration dialog, we opt for the "On-demand disk image" mode, which enables the creation of real-time selective images.
Now we have to specify all the parameters suggested by the disk imager. More information on choosing the appropriate settings can be found in How to create a disk image.

In our case, the drive is connected directly to the computer, but, generally, it would be much safer to use a data protection device when dealing with a defective medium.
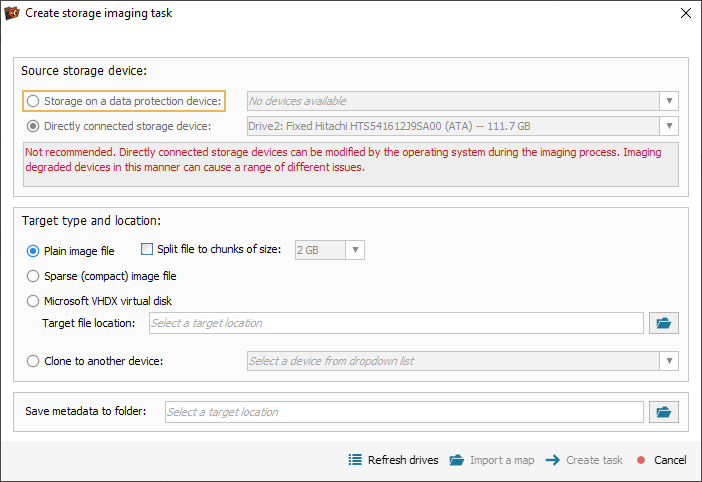
We also need to choose the target image type, such as a plain disk image, "sparse" *.SDLSP image file, a Microsoft *.VHDX virtual disk or a sector-by-sector clone, and specify the location for saving the image file (clone).
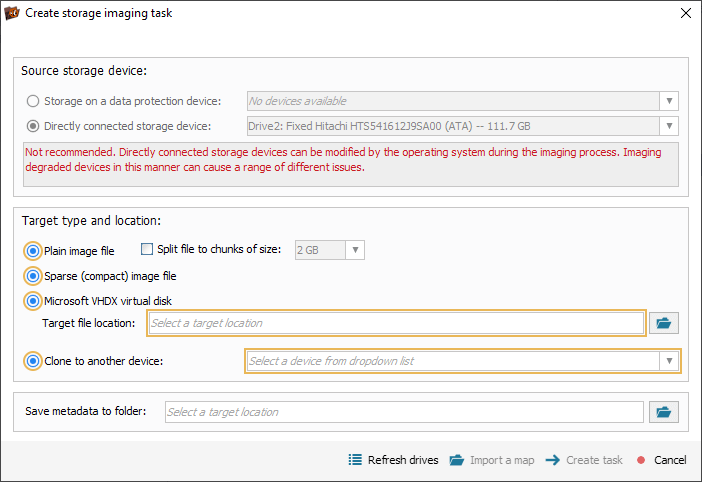
The task configuration file in the *.UITASK format and a map of block states can be saved either alongside the disk image or to a separate path (unless the map is embedded, as with *.SDLSP sparse files).
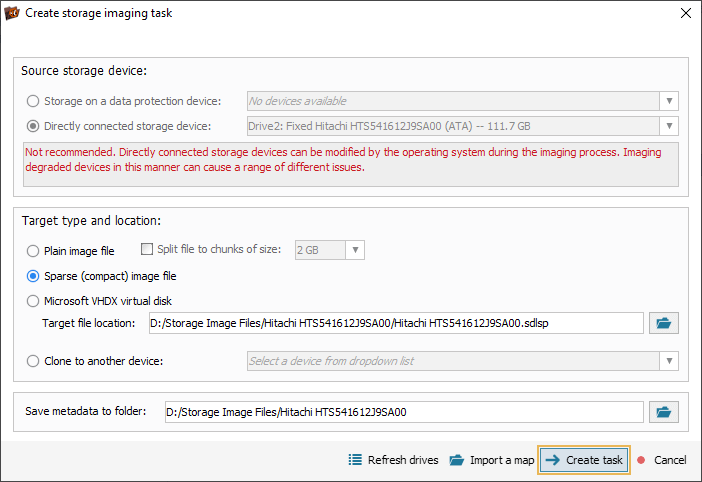
Once we’ve configured these settings, we can press the "Create task" button.
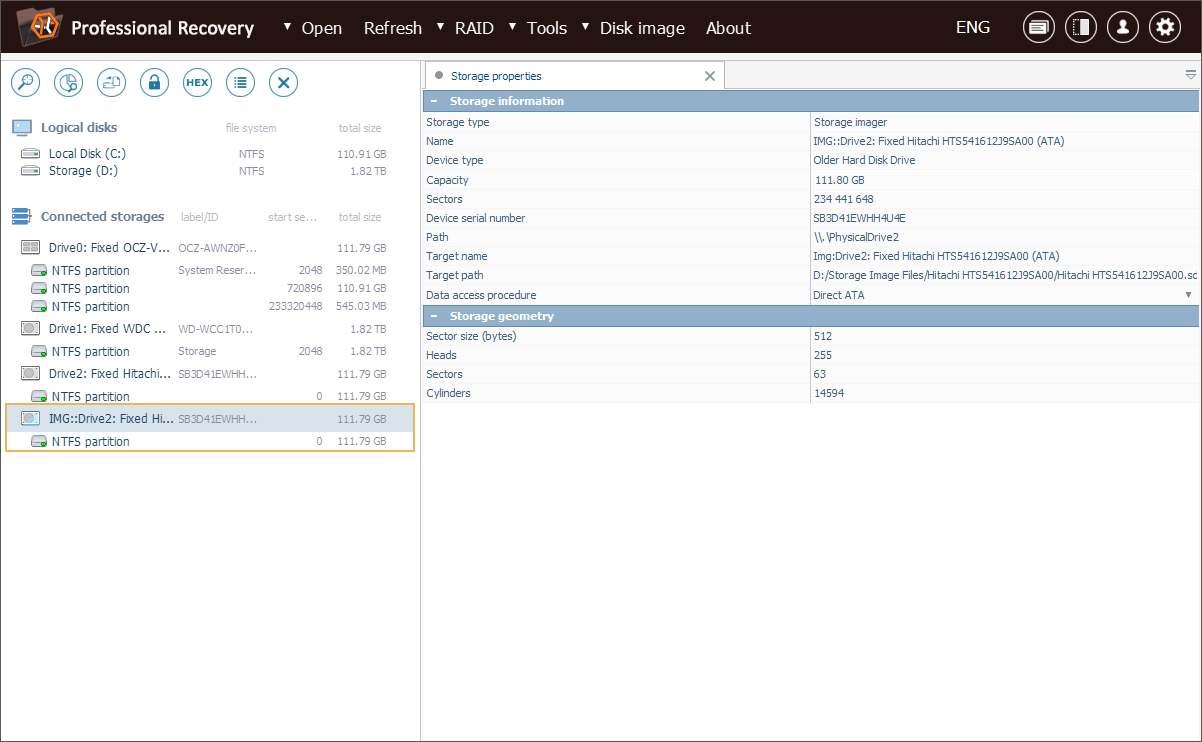
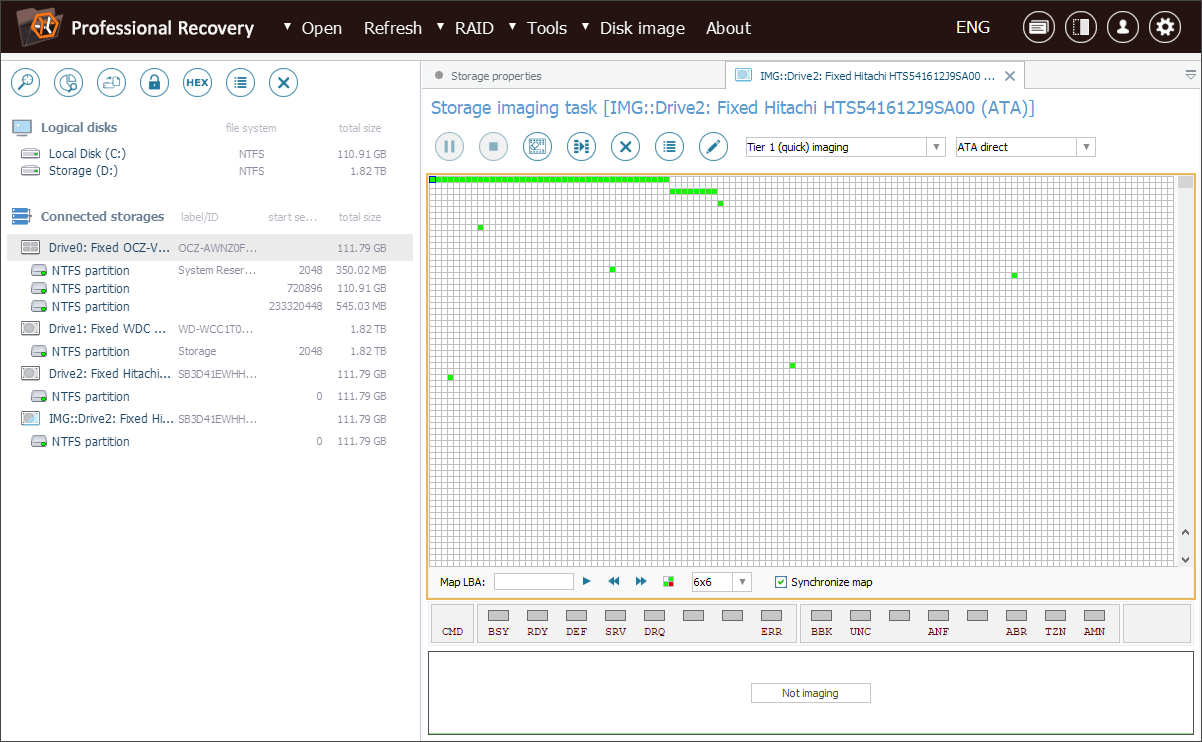
Afterward, a new "Storage imager task" item appears in the storages navigation pane. This virtual storage will be used for all subsequent operations in place of the original device.
A double click on the task will launch a dedicated control panel. With its help, we can manage the task, follow the imaging progress in real-time and adjust parameters based on three pre-configured tiers (normal, quick or final imaging). Each tier can also be customized using the "Edit imaging configuration" tool (following the instructions from How to create a disk image).
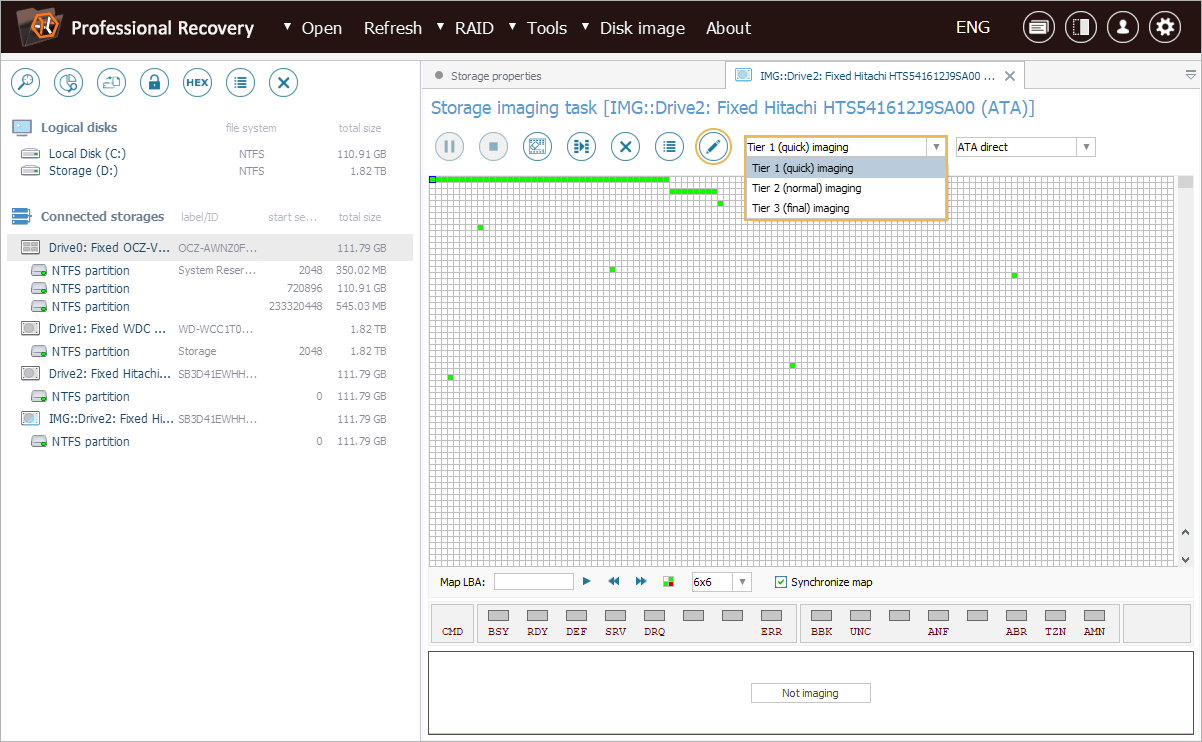
The state of each block in the image will be shown on a map, providing a visual representation of the detected defects.
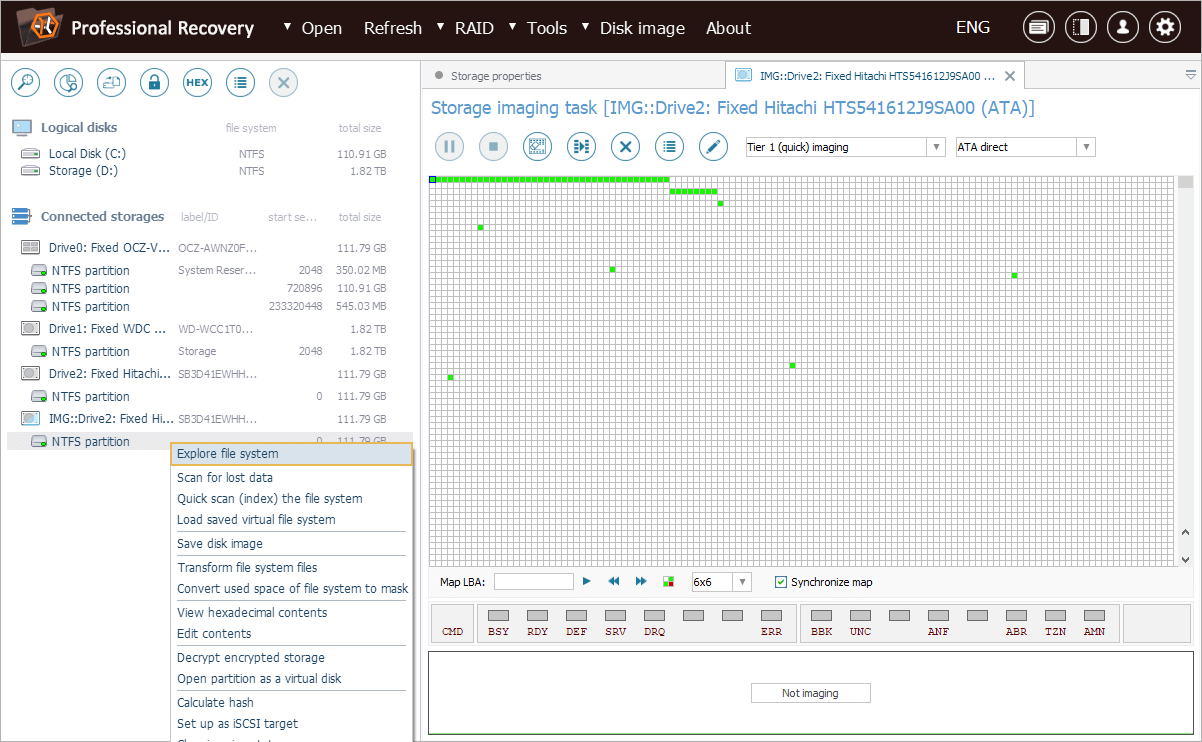
Next, we need to access the partition containing the documents we need to copy. To do this, we find it under the "Storage imager task" item and open its content by selecting the "Explore file system" option from the context menu.
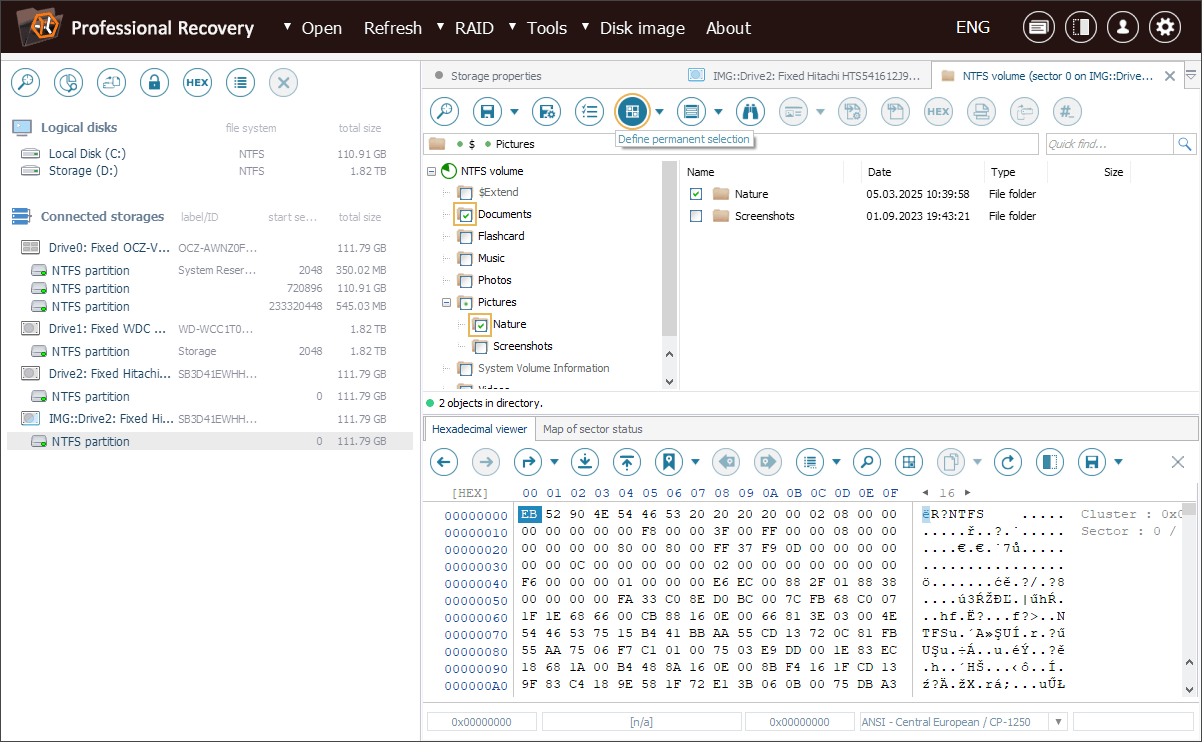
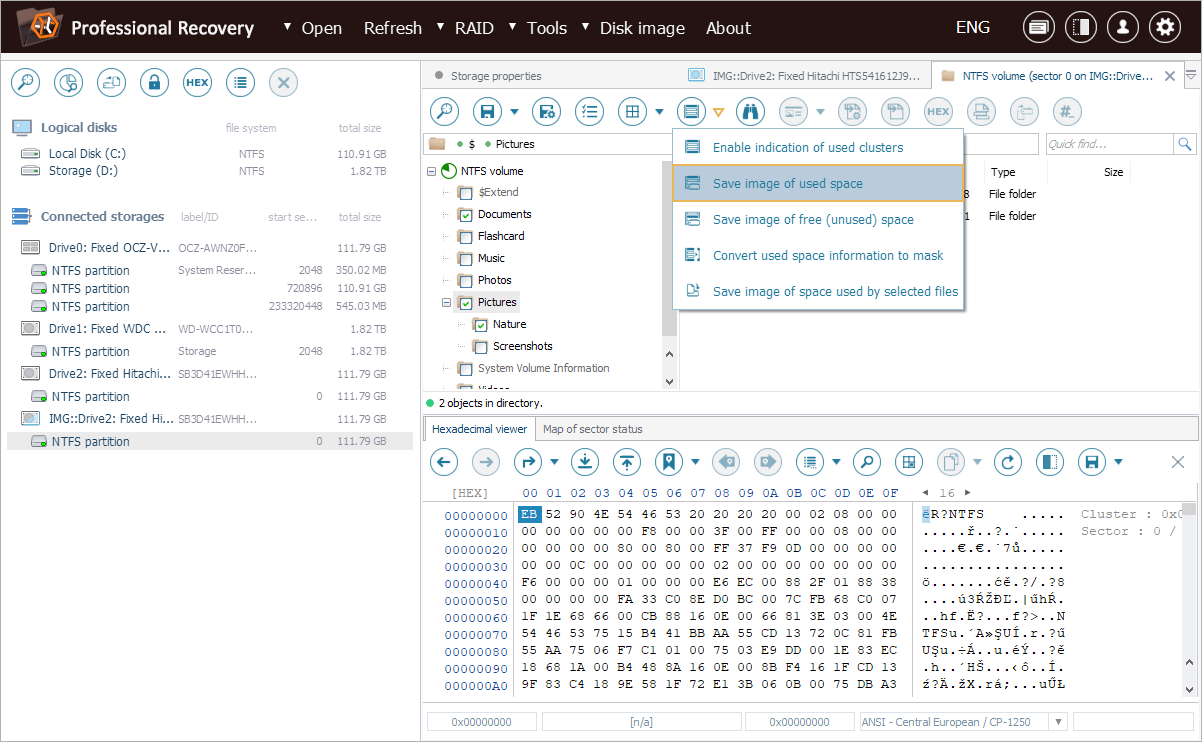
In the Explorer (file browser) interface, we have to pick the "Define permanent selection" tool from the toolbar and tick off each folder or file we want to be included in the image.
Having completed our selection, we need to get the "Enable indication of used clusters" tool, open its context menu and choose the "Save image of space used by selected files" option from it.
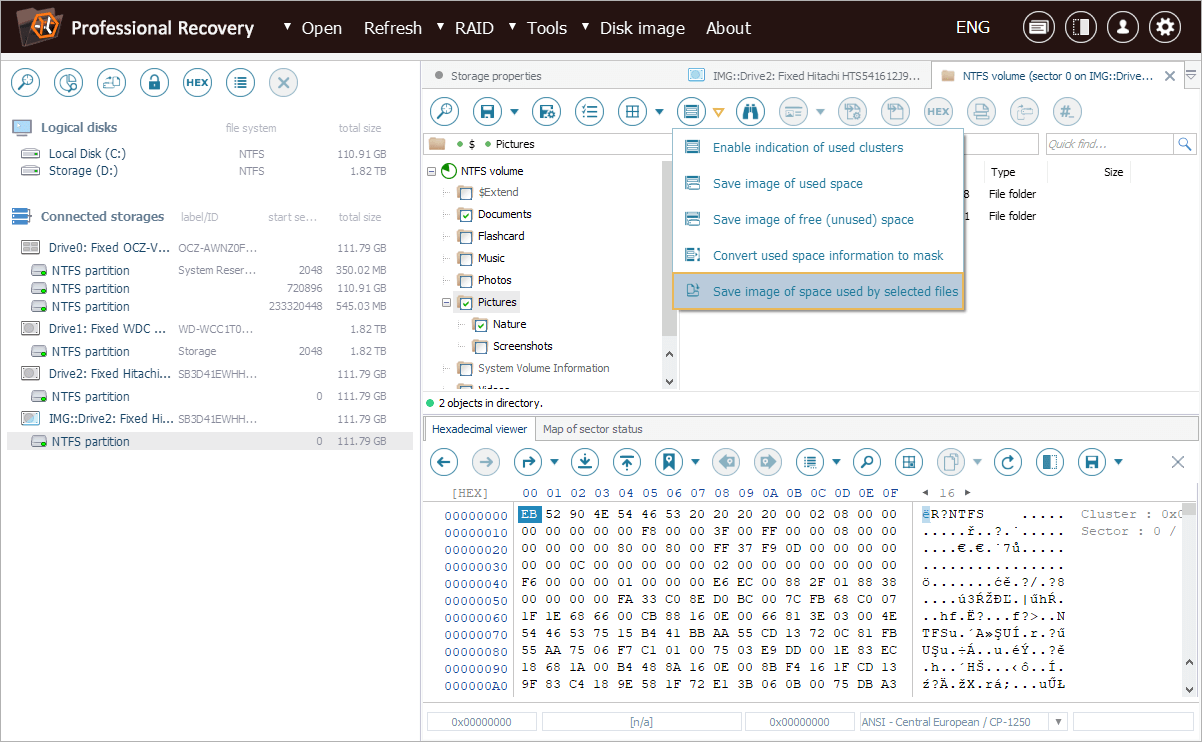
But if we needed to copy the entire file system content rather than specific documents, we would choose the "Save image of used space" option instead.
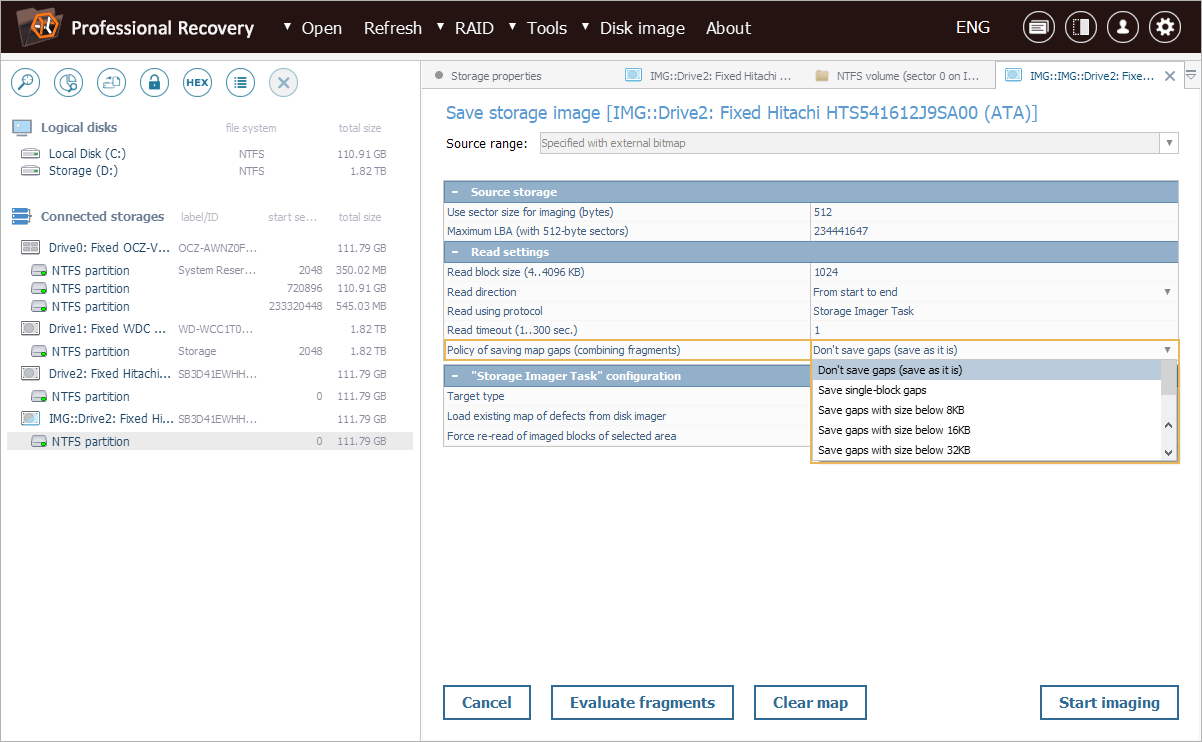
Our image will be generated based on the internally created files location map. The open tab displays settings for a simplified disk imaging process (without control over defects). Here, we can define the policy for handling files in case of fragmentation and cross-fragmentation, such as to ignore all gaps or save those smaller than a specified size. We can also adjust the rest of data reading parameters (as explained in How to create a disk image).
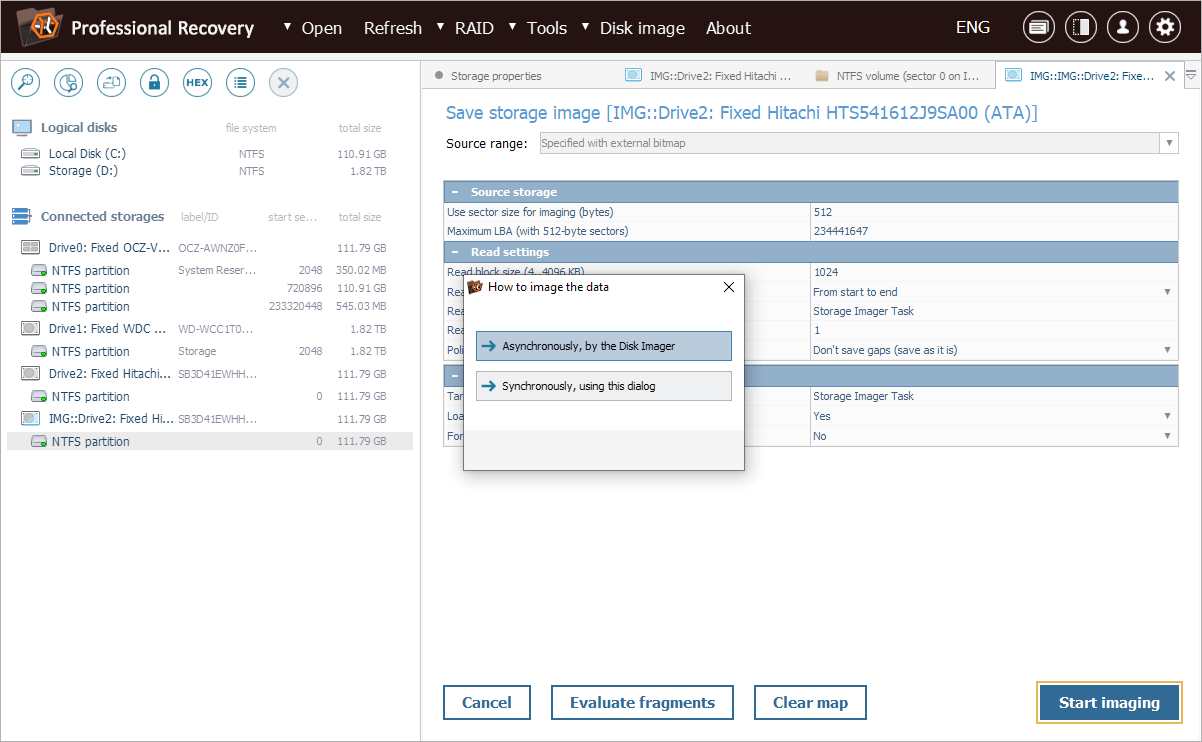
Now we are ready to launch the imaging procedure. We press the "Start imaging" button and then opt for synchronous imaging to be able to control the process via the current dialog.
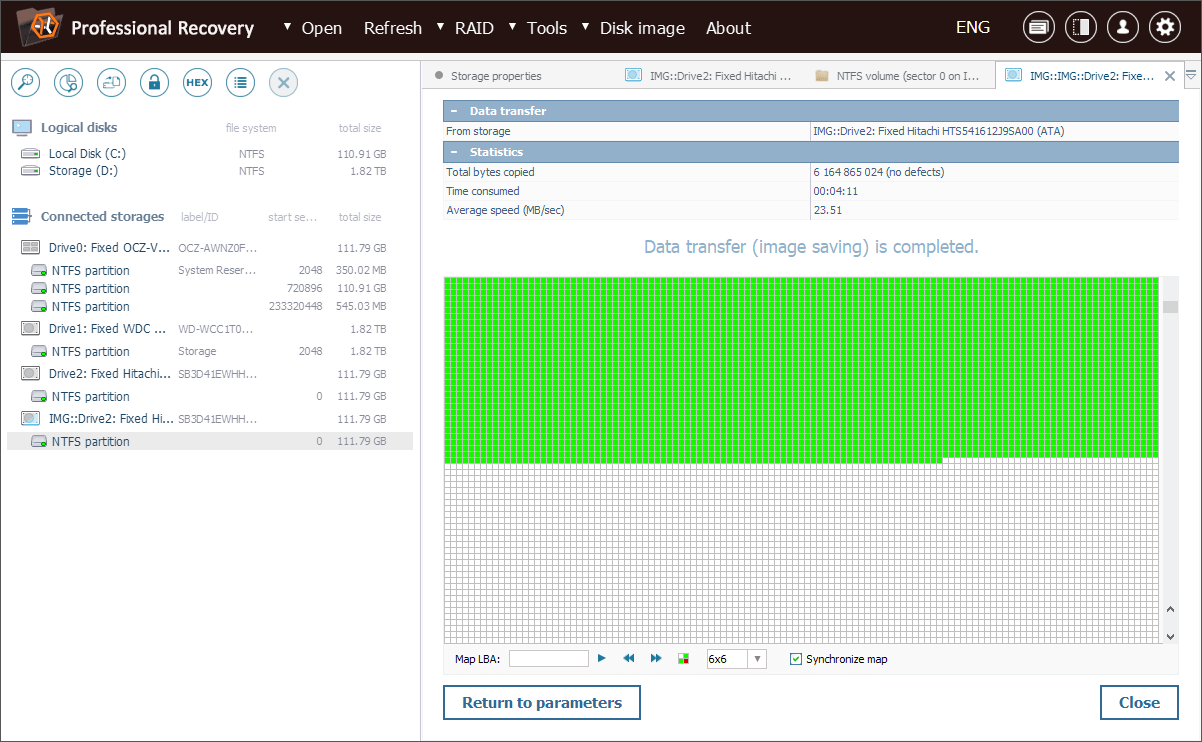
Upon completion, we can see the imaging statistics: the amount of data copied, the time taken and the average speed. In our case, the image was created in under 5 minutes.
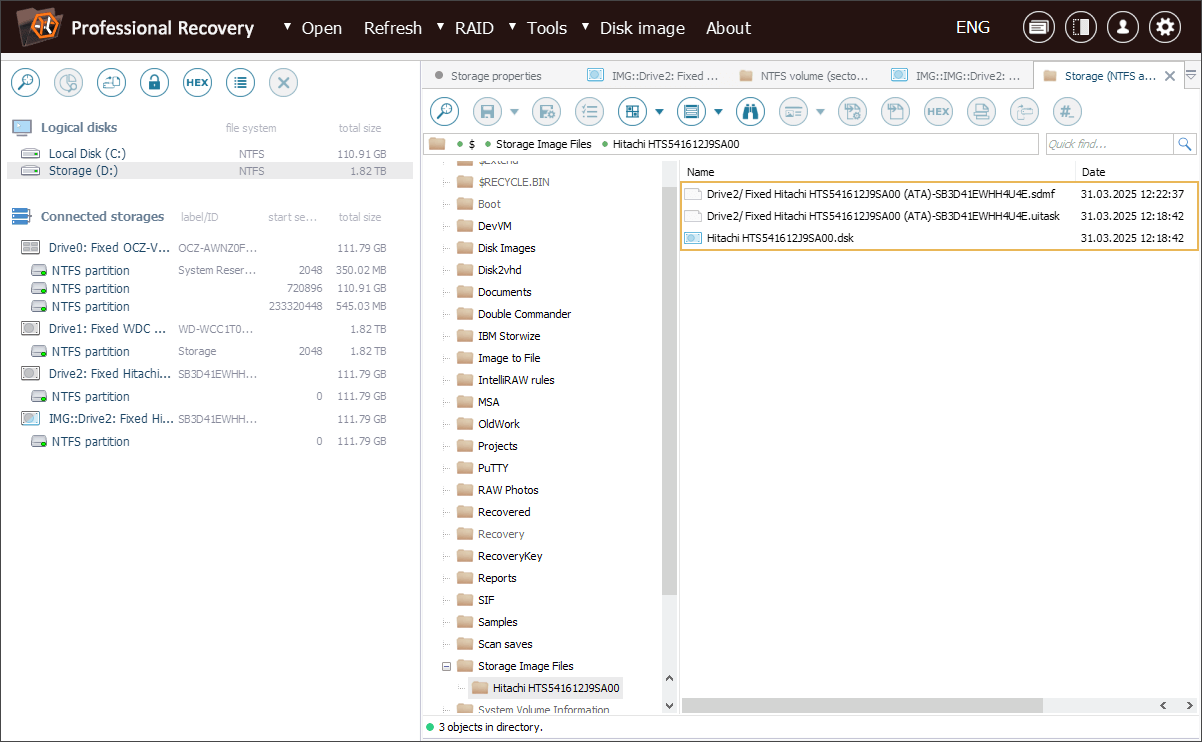
As a result, we’ve obtained three files: our disk image file in the *. DSK (*.SDLSP /*.VHDX) format, a *.UITASK file with the task configuration and a map of block states (defects) in the *.SDMF format (not created for *.SDLSP).
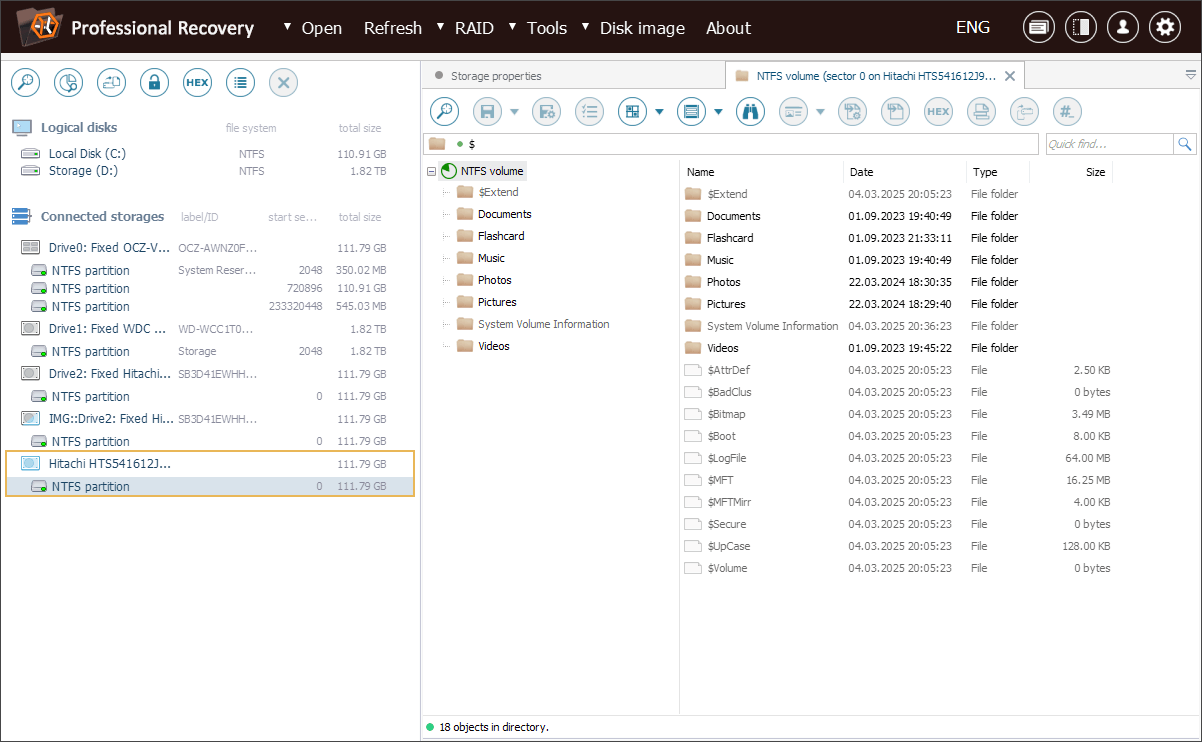
Now we need to mount the created disk image for further operations in the program. For this, we use the "Disk image file or virtual disk" option from the "Open" menu.

After that, we can access this disk image from the storages navigation pane, just like any regular storage device.
Last update: April 02, 2025