Reconstructing lost or corrupted Microsoft Storage Spaces with UFS Explorer’s integrated manager
Microsoft Storage Spaces is a popular software-based storage solution that allows users to combine multiple drives into a single unified pool and then create virtual volumes with various levels of redundancy. While this technology provides considerable benefits under normal use, unexpected issues may arise during data recovery from the storage, especially when its metadata gets damaged or lost.
Most standard data recovery software is capable of identifying and assembling Storage Spaces configurations automatically. However, there are exceptional situations where this automated procedure might not work as intended, such as:
Metadata corruption. The metadata contains vital details about the structure of the Storage Pool and the virtual volumes within it. Without correct metadata, the software cannot properly assemble the storage, therefore, its content remains inaccessible.
Storage Pool reconfiguration. A new Storage Pool configuration may be mistakenly created on the same set of physical drives, replacing the original configuration and leading to the loss of previous Storage Spaces.
Deletion of a Storage Pool/Storage Space. If a Storage Pool or individual Storage Spaces have been accidentally deleted, the automatic reconstruction process may not detect them, making it impossible to retrieve any data.
UFS Explorer of the Professional and Technician editions helps to overcome these difficulties by enabling manual intervention into the process of Storage Spaces reconstruction. Provided that the necessary configuration hasn’t been overwritten, the Manager of Storage Spaces included into the software allows users to restore it from a previous version of metadata. The source of such metadata can be the original member drives or disk image files loaded into the program. The selected metadata version is then used to assemble the available virtual volumes, including simple (stripe), mirror, parity, dual parity and multi-tier Storage Spaces.
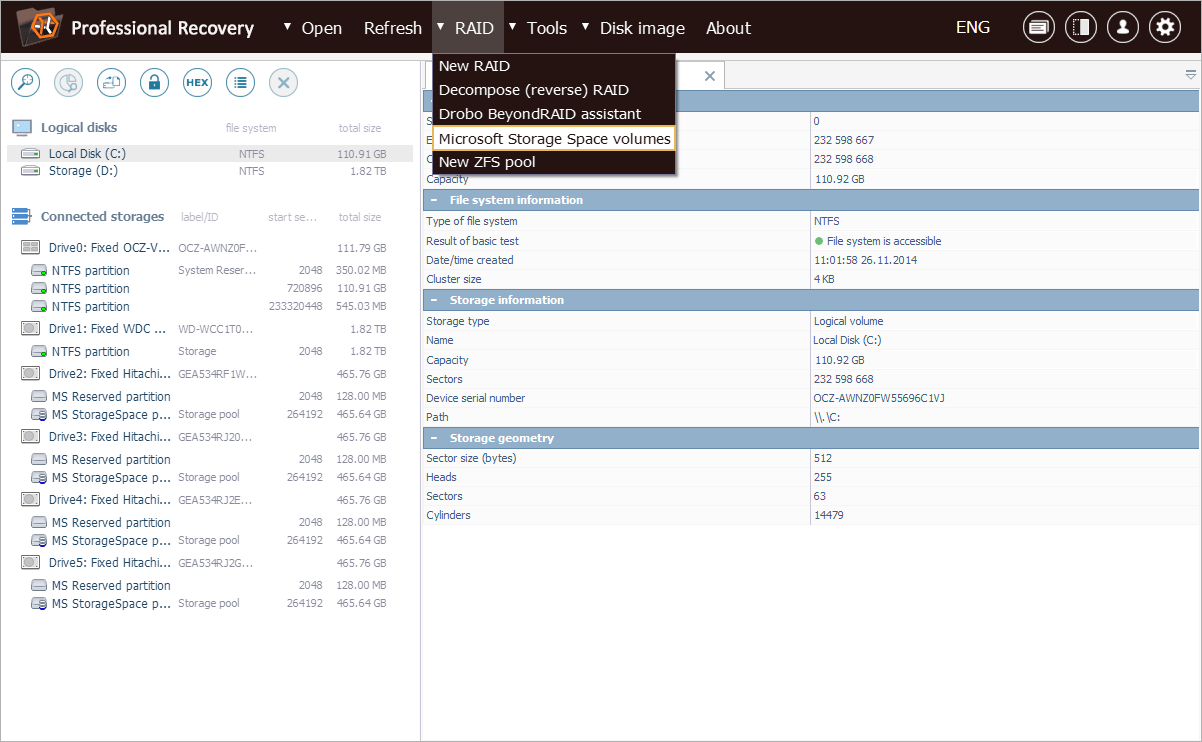
The Manager of Storage Spaces is implemented in the software via a dedicated tool – "Microsoft Storage Space volumes" presented under the "RAID" section of the main menu.
To illustrate how it works, let’s look at a practical example of its use. We have a Windows system whose entire Storage Pool has been lost due to an accidental crash of the OS. The software doesn’t detect this storage automatically, so we can assume that its current metadata is no longer intact.

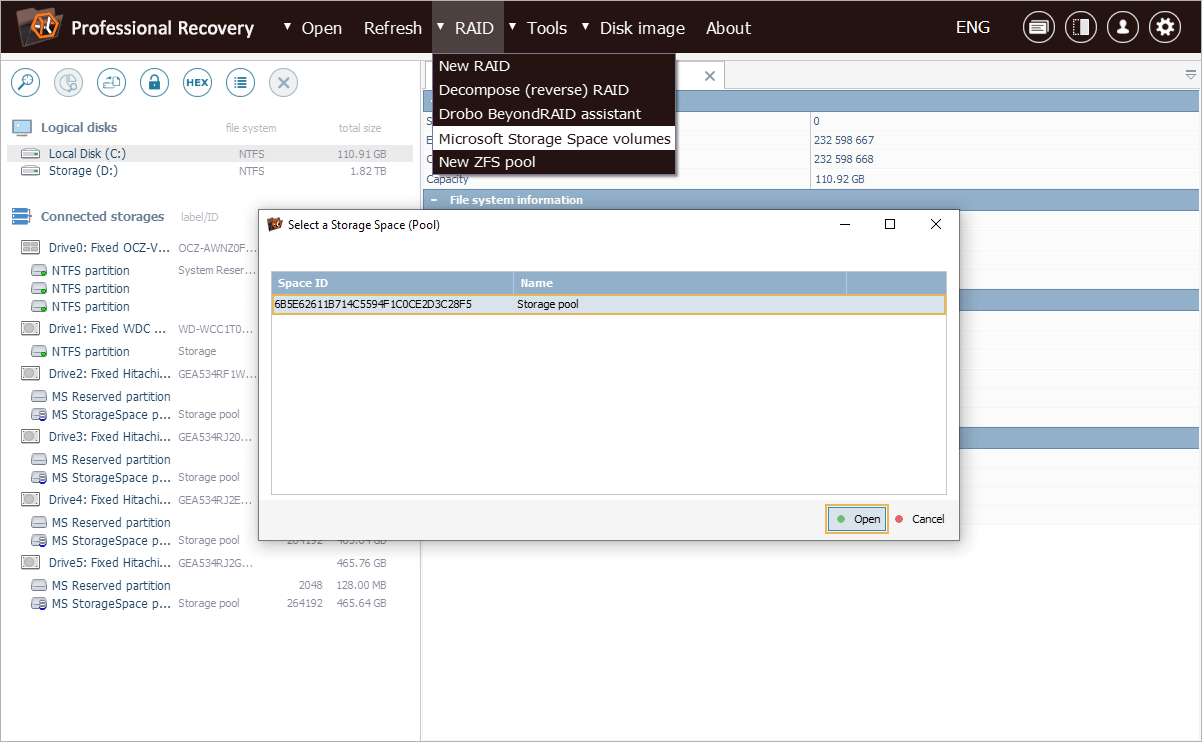
Instead of giving up on data recovery, we are going to check if it is possible to restore the storage configuration from a previous metadata version. We start by opening the Manager of Storage Spaces using the corresponding option from the "RAID" menu. In the manager’s dialog, we see a Storage Pool configuration that has been extracted from the found remnants of metadata. We need to select it and click "Open" in order to proceed.
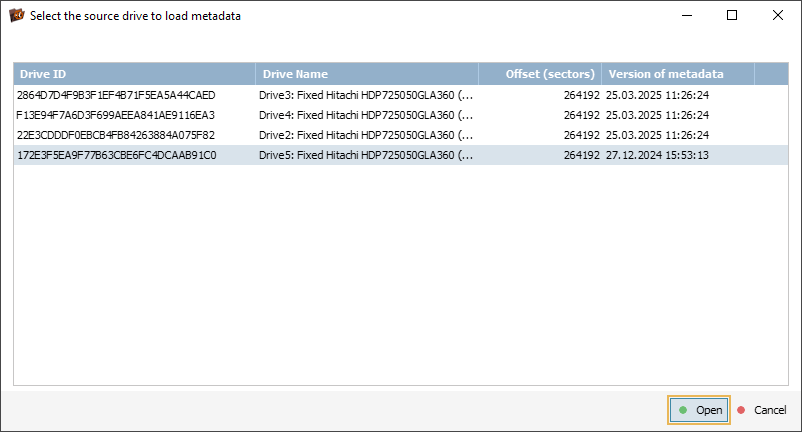
After that, the program shows the list of drives/disk images that may be used as sources of the Storage Pool metadata. We have to look through the identified metadata versions and select the most relevant one based on the time of its creation.
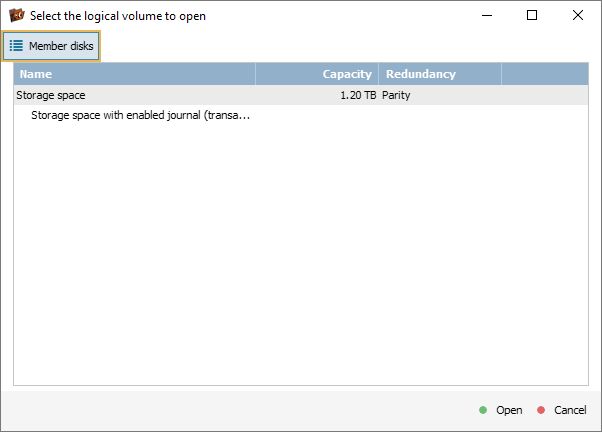
Once we click "Open", the software loads the metadata from the selected source and shows all found virtual Storage Space volumes. Now we can choose the necessary volume based on its name, size and type.
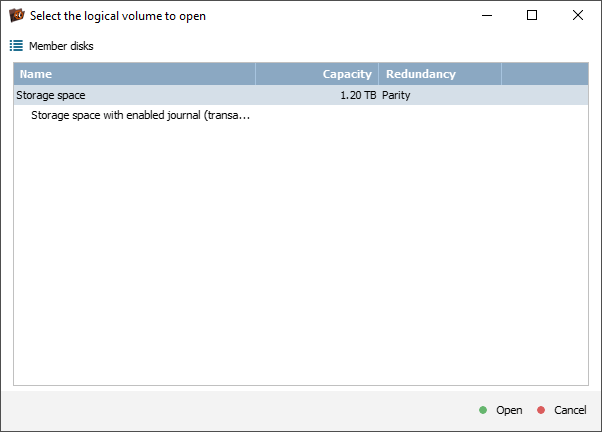
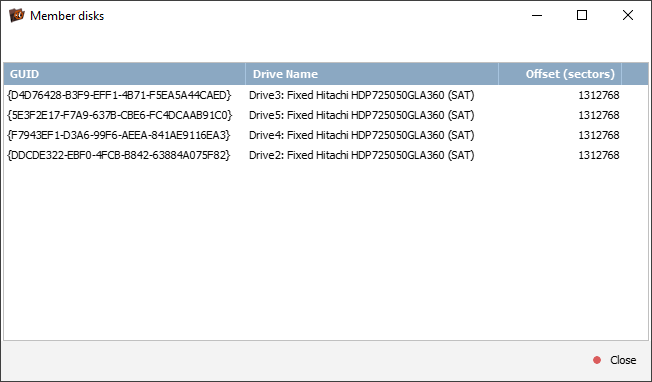
At this point, we can also press the "Member disks" button in order to review the list of physical drives comprising each volume.
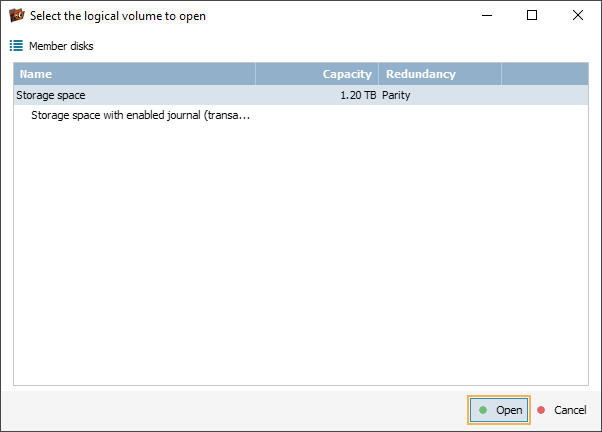
After we click "Open" once again, the software adds the selected volume to the storages navigation pane for further operations in UFS Explorer.
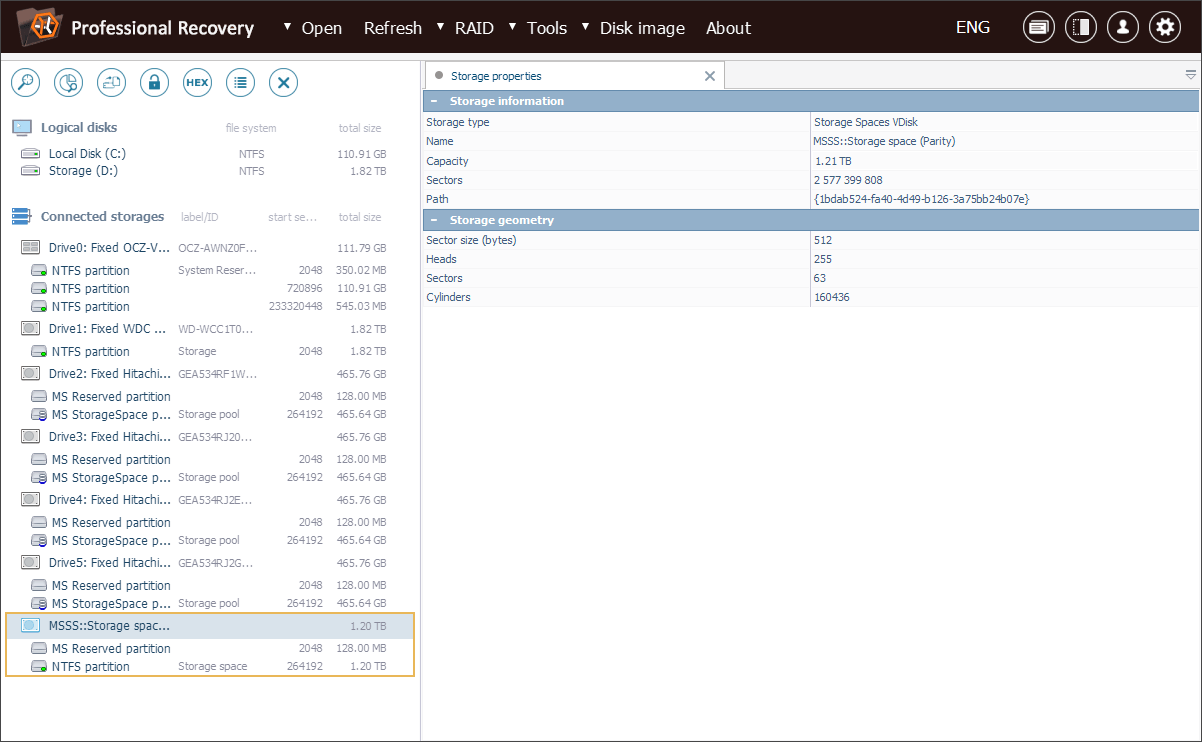
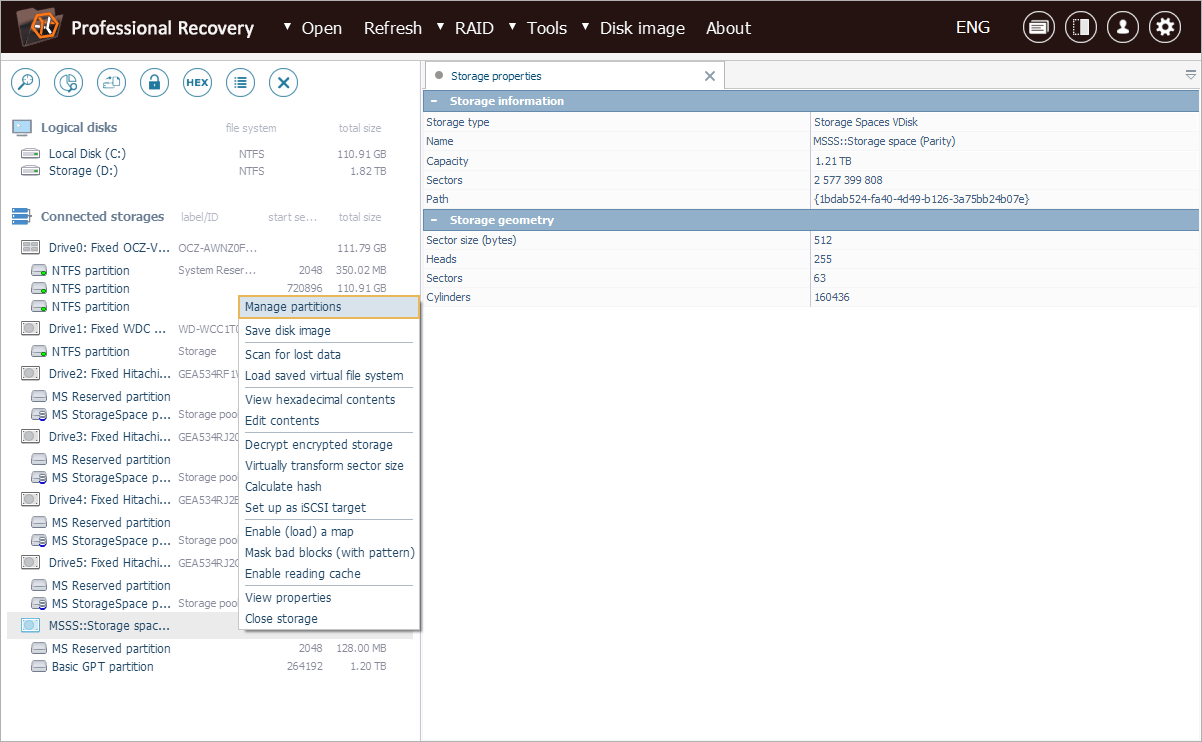
In our case, the Storage Space volume contains an accessible data partition with the NTFS file system. If it didn’t, we would attempt to reconstruct it using Partition Manager, as shown in the following example.

We launch the component using the "Manage partitions" option from the storage context menu.
In the Partition Manager window, we need to select the "Search undetected partitions by metadata" tool and mark off the box next to the NTFS and ReFS file system types.
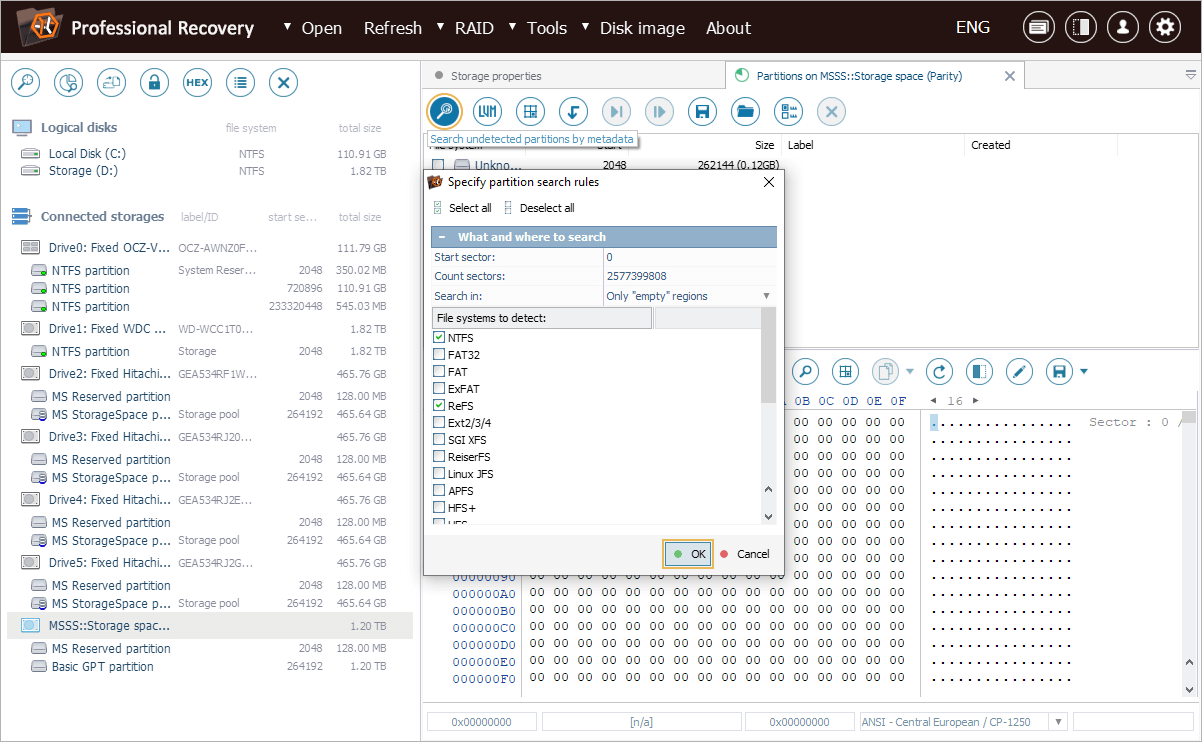
Once we click "OK", Partition Manager starts searching for the lost partitions and adds the detected ones at the end of the list of connected storages.
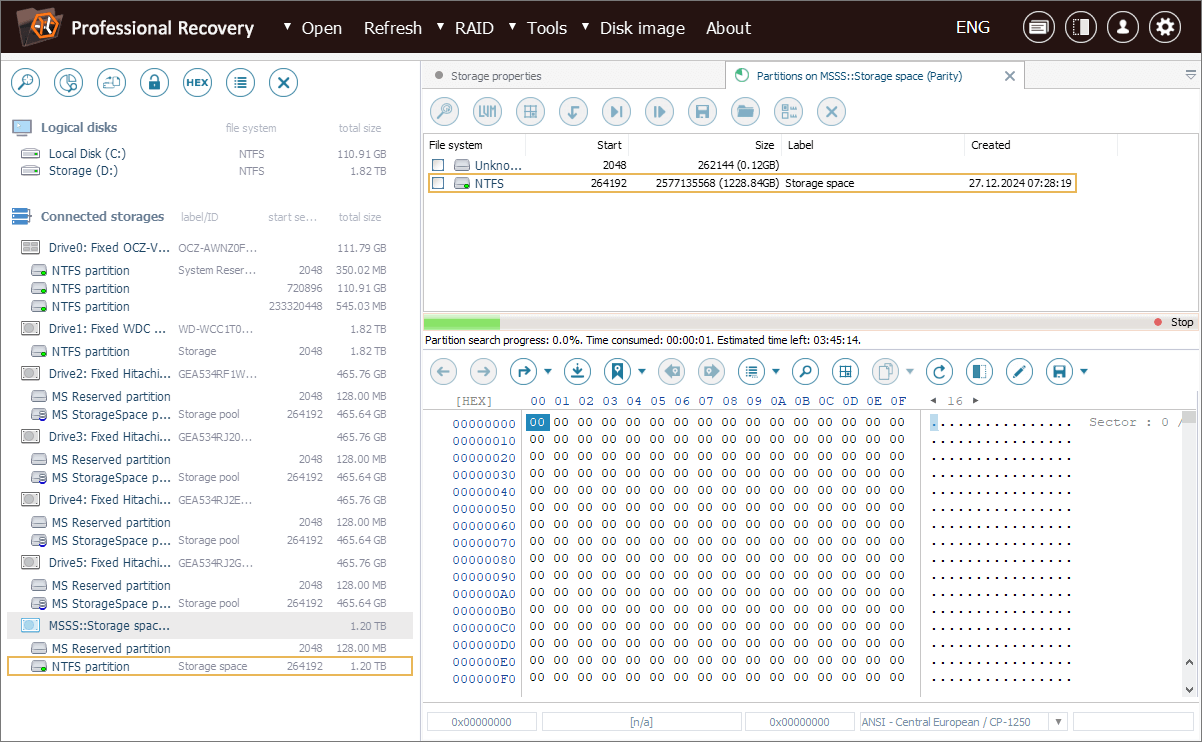
We already see the required volume, so we can press the "Stop" button, without waiting for the scan to finish.
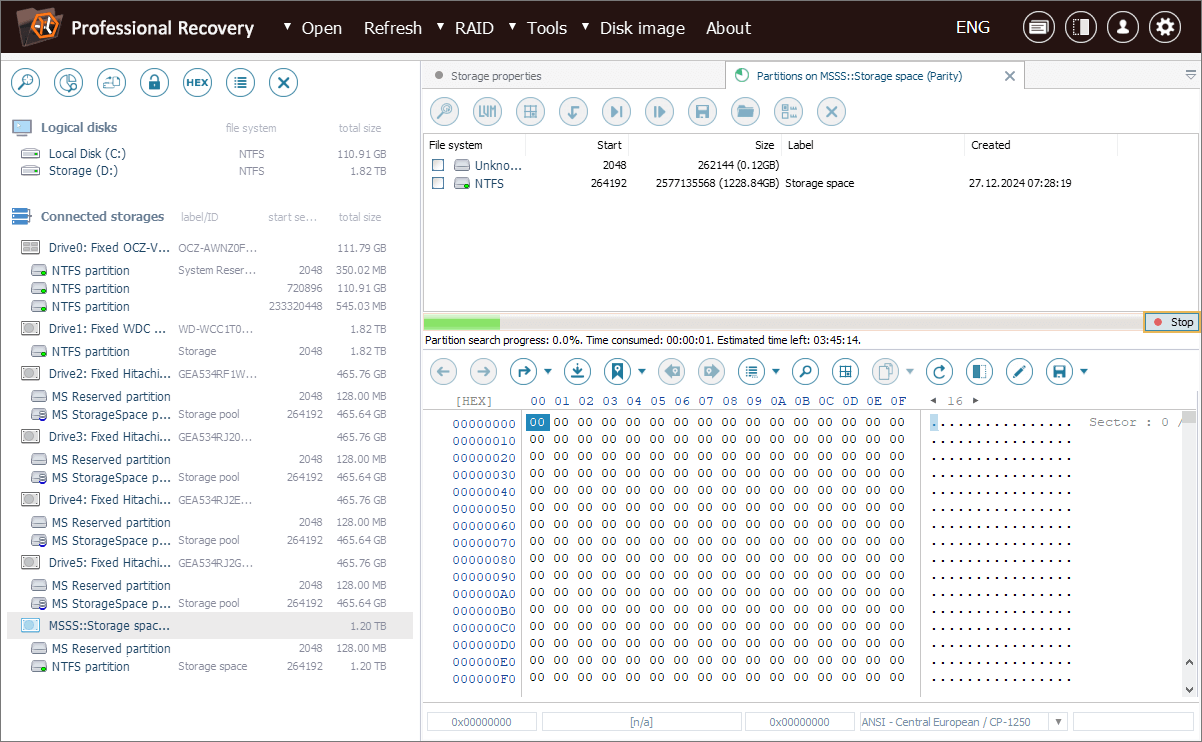
Now we can access the content of this Storage Space volume and recover the lost files.
Last update: March 26, 2025