Guide to recovering data from Dell EqualLogic SAN
Once embraced for their ease of management, efficiency and great scalability, Dell EqualLogic SANs became widely adopted across various industries. Though the days of their extreme popularity have already passed, these storage arrays remain indispensable for many organizations. At the same time, like any electronic system, they are prone to occasional operational issues, including hardware failures, software bugs and human errors, that may affect mission-critical files. In such situations, the ability to recover data from EqualLogic SAN becomes essential to cope with severe consequences of the encountered mishaps. So, let’s delve into all details of the data recovery procedure.
Peculiarities of data recovery from Dell EqualLogic SAN
When it comes to enterprise-class solutions, data recovery is typically not quite straightforward, and Dell EqualLogic SAN doesn’t make an exception in this regard. Having a certain understanding of the storage architecture is crucial to develop an effective strategy. All its key specificities are described in the basics of Dell Equal Logic SAN, but particular attention should be given to the following aspects:
Connectivity challenges. Like all SAN appliances, Dell EqualLogic arrays do not allow direct access to their drives, and there are no expansion shelves that could be used for this purpose. Therefore, an additional "passive" enclosure is required to connect them to a computer, for example, a JBOD expansion. The number of drives to be housed can range from a dozen in basic models to as many as 84 in more advanced ones. The most common disk shelf construction includes 24 drives, which is quite a lot and may push some Host Bus Adapters up to their limits. Therefore, in time-sensitive data recovery scenarios, it is advisable to employ an upmarket HBA board with high throughput, that would be capable of delivering fast data transfer rates for such a number of drives. Yet, if speed is not the primary concern, lower-priced HBAs, like LSI 9200, are able to handle up to 256 drives, even though with slower performance.
Dynamic data distribution. The logical structure of Dell EqualLogic SAN isn't overly complicated, as it is based on the standard RAID technology. Nonetheless, the primary complexity arises from the dynamic nature of the system's data placement mechanism. The blocks are scattered across different offsets on multiple RAID sets, and it is impossible to predict their exact locations. The mapping information can only be extracted from the system’s metadata.
That being so, it is first necessary to identify the storage pool’s organization. Its configuration is typically stored in the superblock. The pool may be represented by a single RAID set or comprise several arrays. The exact layout depends on the number of drives and chosen RAID policy. When the RAID 6 policy is selected, Dell EqualLogic creates a level 6 array with fixed parameters. However, such an array can include up to 16 drives. When there are more drives, the server creates more RAID 6 sets and then combines them into a span. If the policy is configured as RAID 50, the system creates a level 50 array, also with fixed parameters. If the number of available drives is not enough for RAID 50, RAID 5 is created. Also, the storage policy can be set to RAID 10. In case the storage pool is expanded, Dell EqualLogic creates additional arrays and consolidates them into a span as well.
The next step is to parse and interpret the SAN metadata in order to obtain address translation and discover how data is distributed across volumes within the storage pool. The result of such analysis is often referred to as "volume data map", which provides conversion between logical and physical addresses and enables correct data reading.
Compatibility issues. Generic data recovery tools usually do not have specific support for such proprietary systems like Dell EqualLogic SANs, hence, they may be unable to interpret the unique metadata utilized by such appliances. However, without proper support, it is impossible to extract any meaningful data from their volumes. Developing custom metadata converters for Dell EqualLogic SANs can be a viable option for data recovery experts, as this helps to automate the process of parsing EqualLogic metadata. But even with such a converter in place, the underlying complexities of the storage assembly may still present significant difficulties. Meanwhile, Data recovery plugin for Dell EqualLogic, a supplementary component for UFS Explorer Technician, has been designed as an ultimate solution for data recovery from Dell EqualLogic SANs. The plugin automatically detects the superblock as well as other essential metadata structures and reconstructs the storage configuration, eliminating the need for manual intervention. As a result, all volumes and snapshots become readily accessible in the software, so users can move on directly to data recovery operations.
Please note: You may employ your own Dell EqualLogic SAN metadata converter as an alternative to this plugin. The converted metadata can be imported into UFS Explorer Professional Recovery or UFS Explorer Technician as an external data map and will be utilized by the software to interpret the SAN's storage structure. An example of using this mechanism is described in How to recover data from Dell EqualLogic.
Preparation for the procedure
Before starting the procedure itself, it is important to prepare all the resources required for data recovery from Dell EqualLogic SAN. The preparation measures include:
Preparation of equipment. Since direct connection to the Dell EqualLogic SAN drives is not possible, they must be removed from the original disk shelves and attached to a separate computer or server for recovery purposes. For this, you may move them to a JBOD enclosure that supports their form factor and interface.
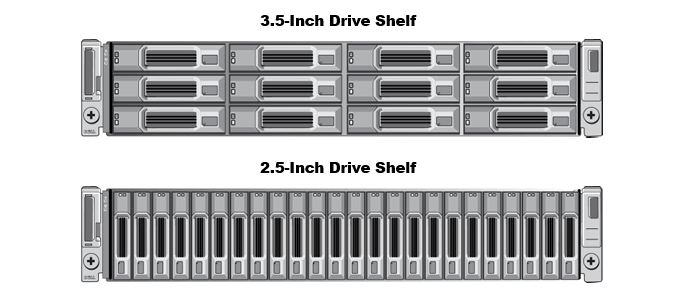
Pic. 1. JBOD disk shelf
The enclosure, in its turn, can be connected to a compatible SAS HBA board with the help of any suitable cable, such a standard SFF-8088 cord.
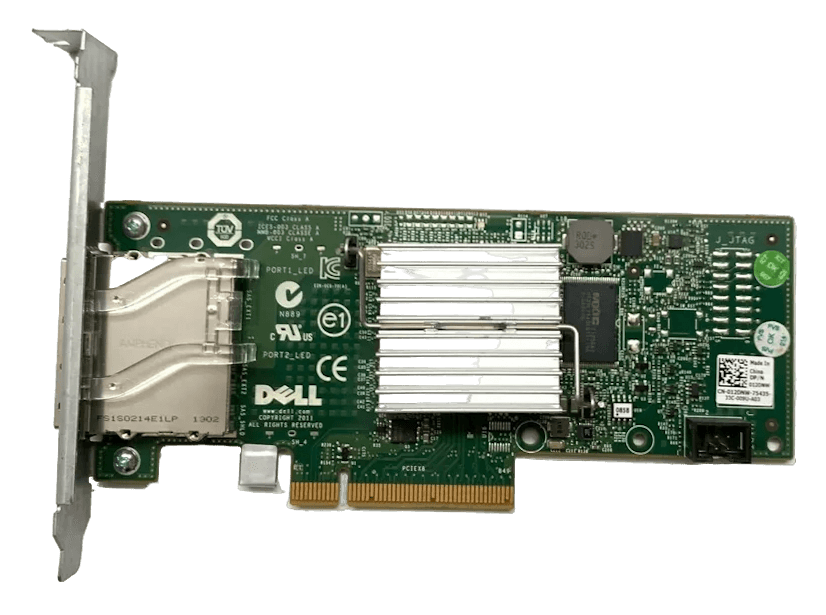
Pic. 2. SAS Host Bus Adapter
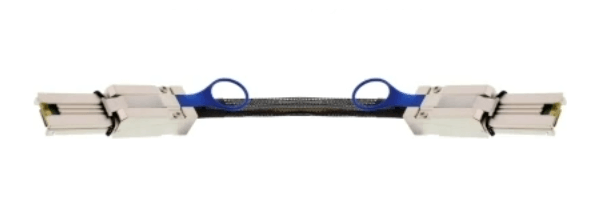
Pic. 3. SFF-8088 cable
When finished, you need to make sure that the drives are recognized correctly.
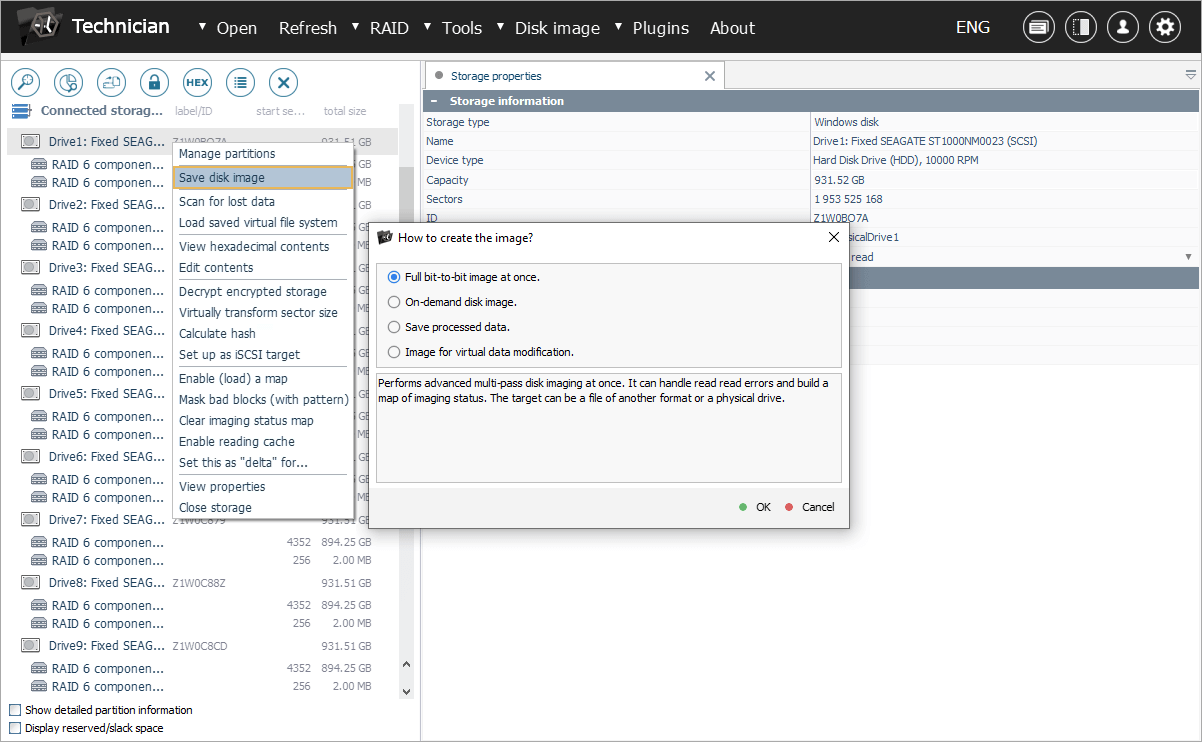
Creating disk images. Before attempting any recovery manipulations, it is highly desirable to create disk images of the available drives, especially when data loss is related to any kind of hardware or physical drive failure. Working with the copies instead of the original media is a reliable approach that allows minimizing the potential for further damage. Please refer to How to create an image of a drive for detailed guidance as to the imaging procedure.
Plugin installation and activation. Download Data recovery plugin for Dell EqualLogic from the product webpage. After that, install this add-on by following the on-screen instructions. Once installed, the plugin will automatically show up among the plugins in the interface of UFS Explorer Technician. You can also access it through the Plugin Manager. To make full use of the plugin and save the recovered data, you will also need to activate the product’s license. Otherwise, you'll only have access to a preview of the reconstructed virtual volumes and snapshots within the software.
How to recover data from Dell EqualLogic SAN
Once you've finished the necessary preparations, you can proceed with logical data recovery using the following instructions:
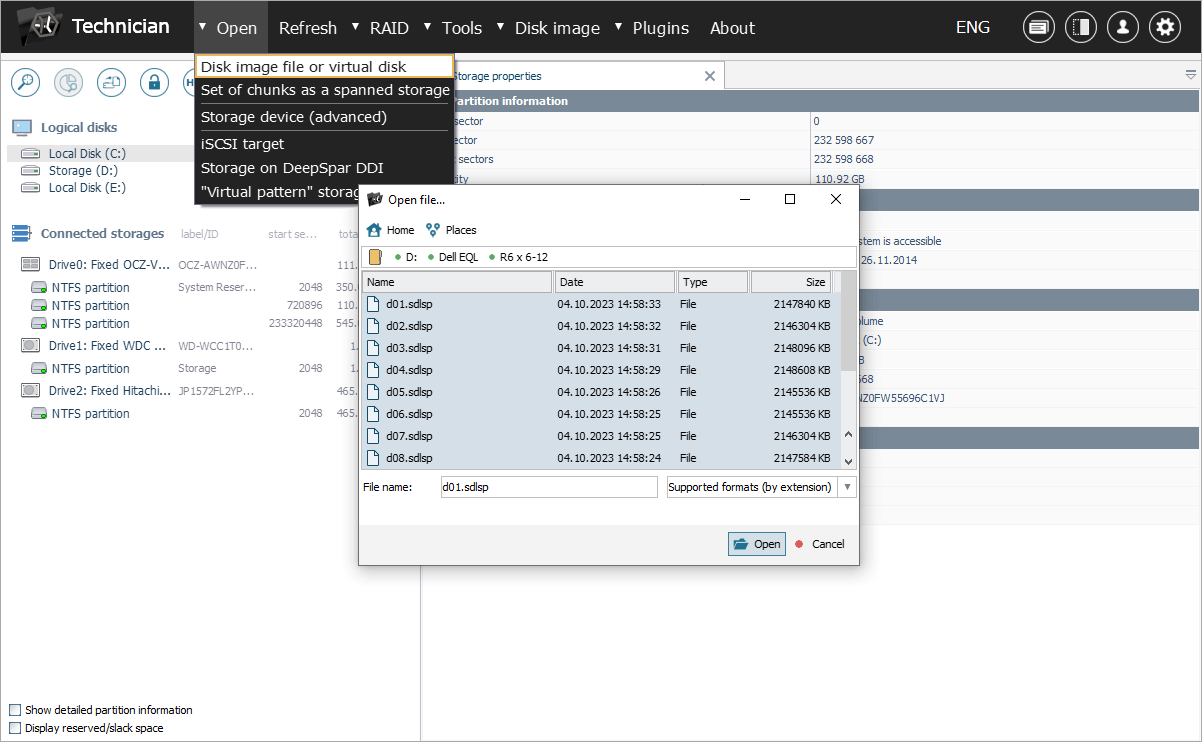
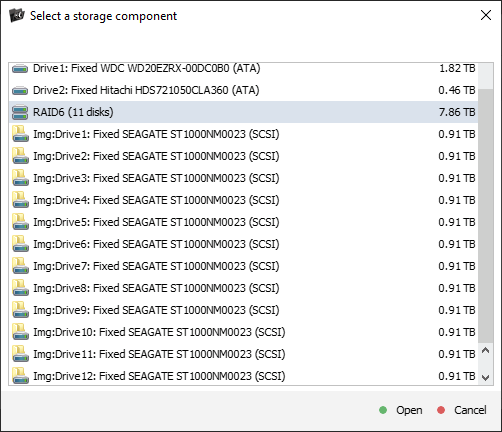
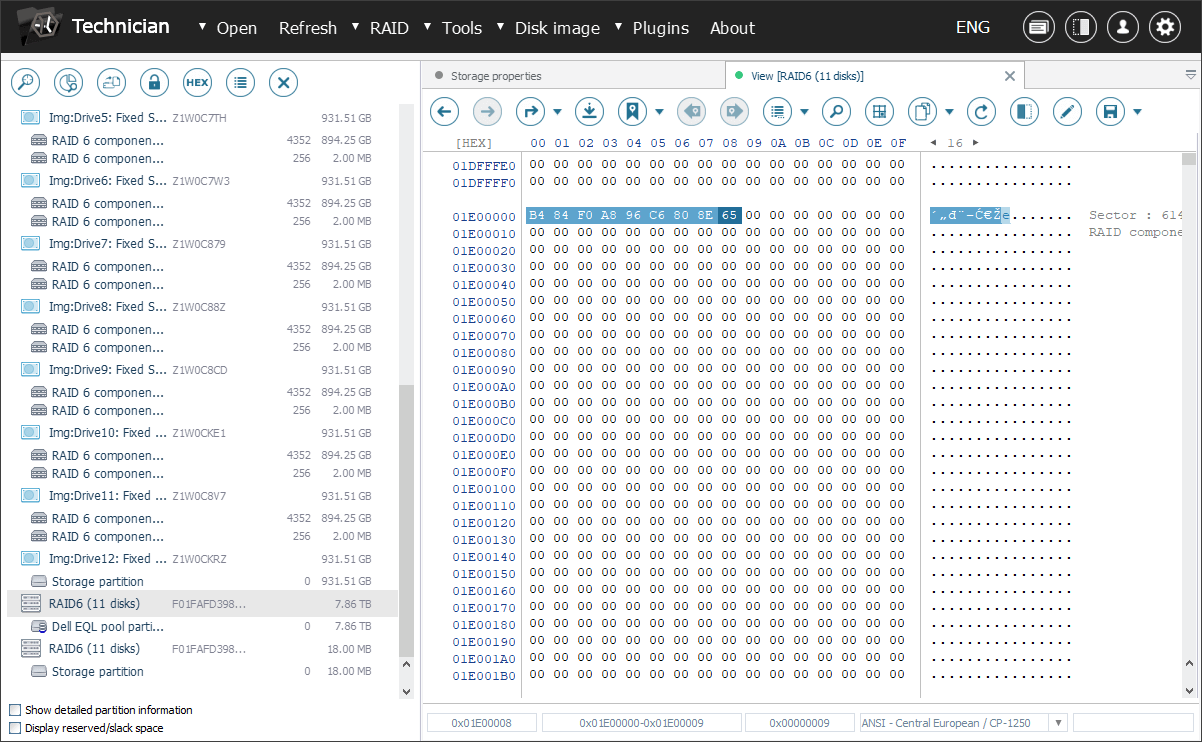
Open all disk images created for Dell EqualLogic drives in the interface of UFS Explorer Technician.
Access the "Open" menu within the software and choose the "Disk image or virtual disk" option. After that, navigate to the directory where your disk images are saved. Once you've located them, select each disk image file individually and then click the "Open" button.
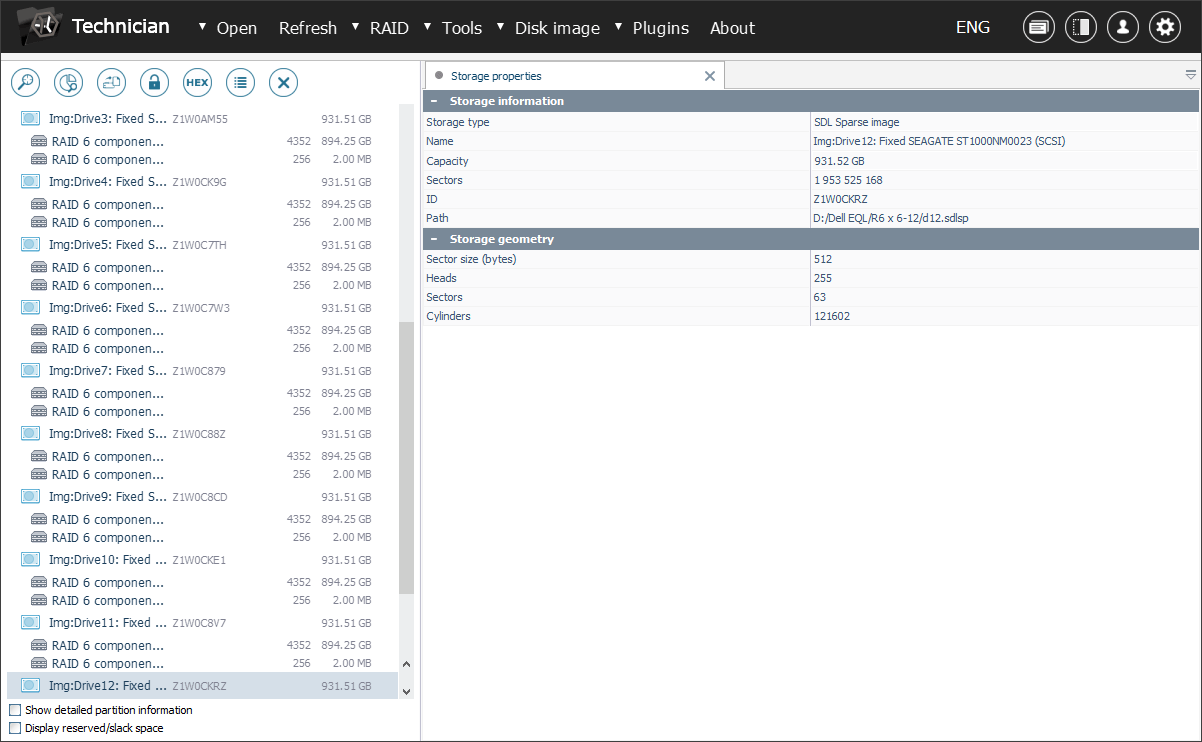
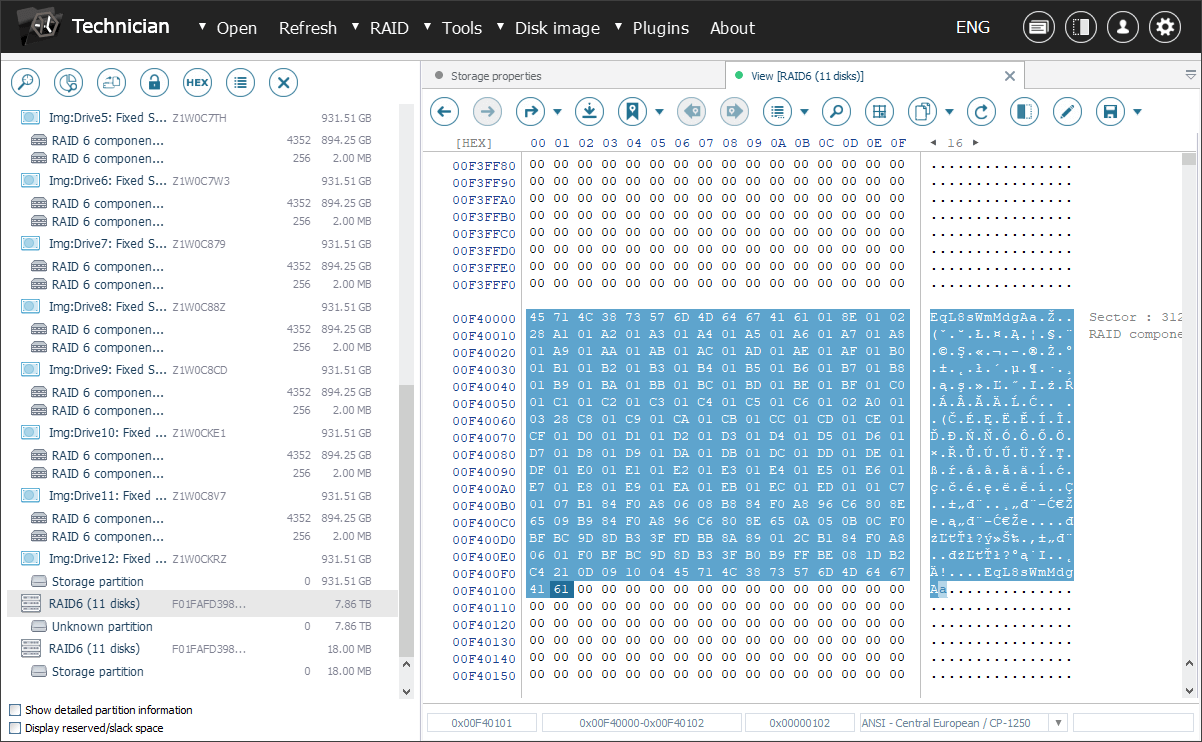
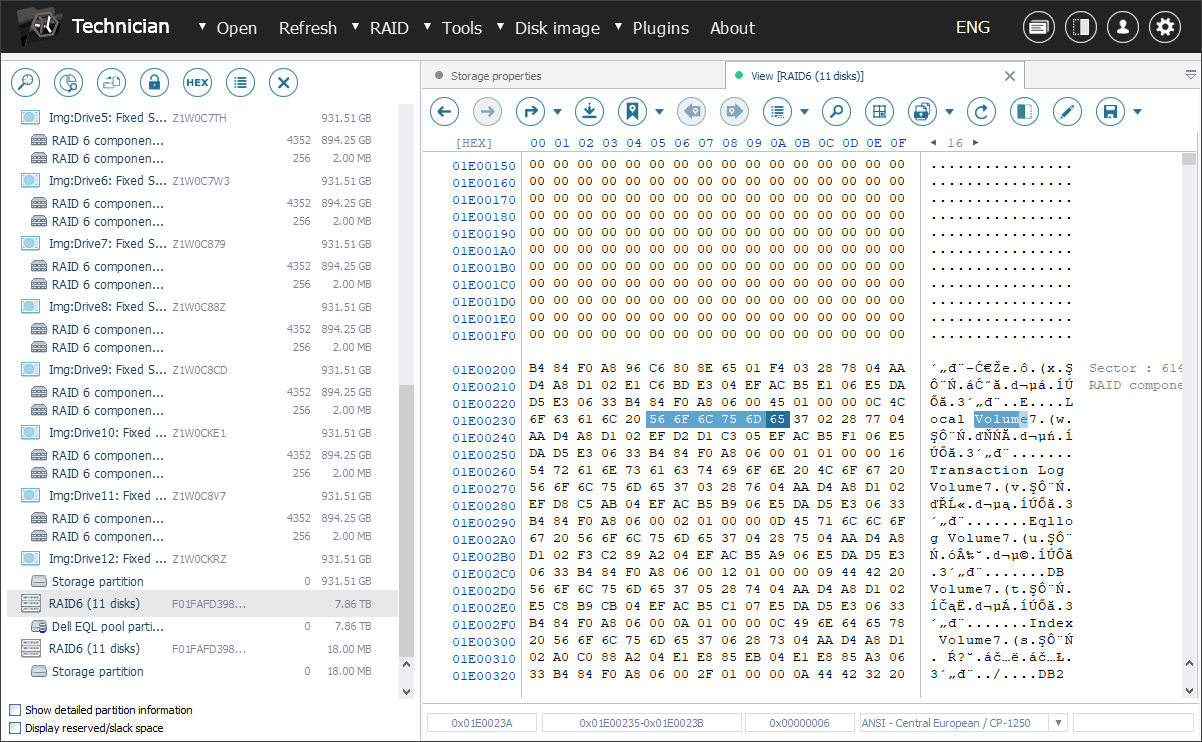
After completing these steps, the disk images should appear in the left pane of the main window of UFS Explorer Technician, alongside any other detected storage devices. Normally, a pair of RAID component partitions of the same level are created on each drive, except for "spare" ones. Yet, only the larger of these partitions constitute parts of the storage pool’s array.
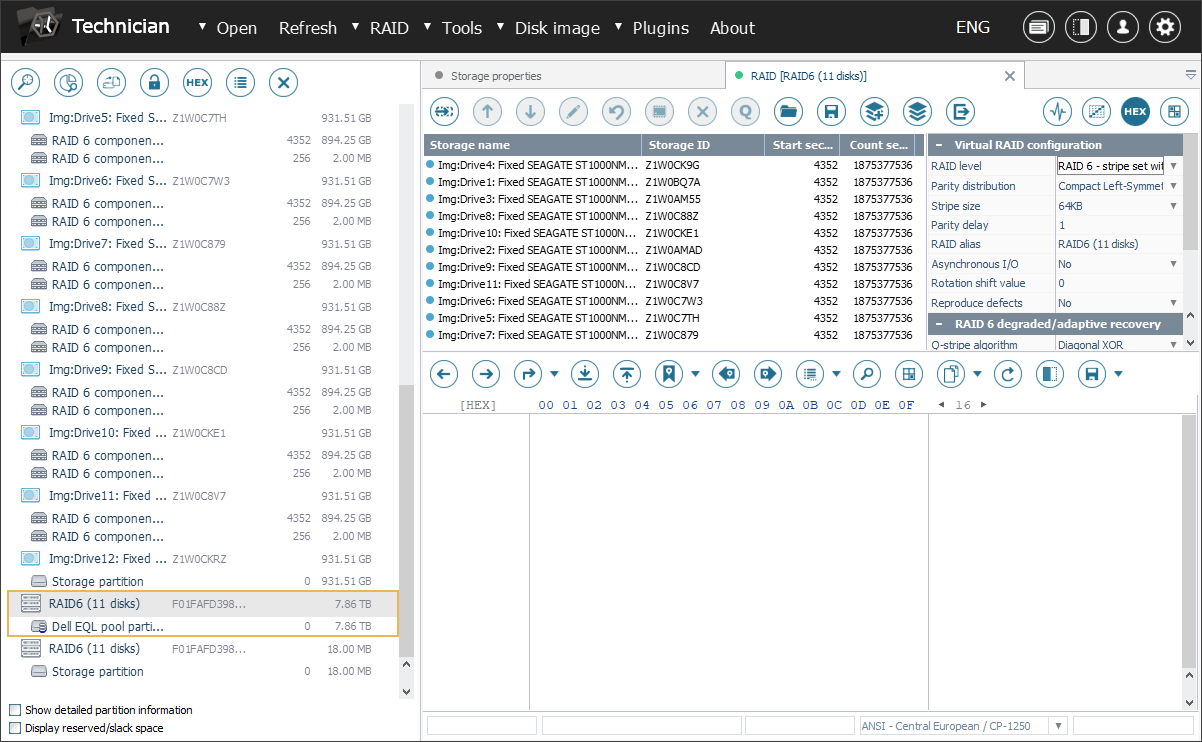
As a rule, the RAID configuration is reconstructed by the software automatically with the correct parameters.
However, if the RAID metadata is damaged to the extent that prevents automatic reconstruction, manual assembly of this array is required to move on to using the plugin’s functionality.
-
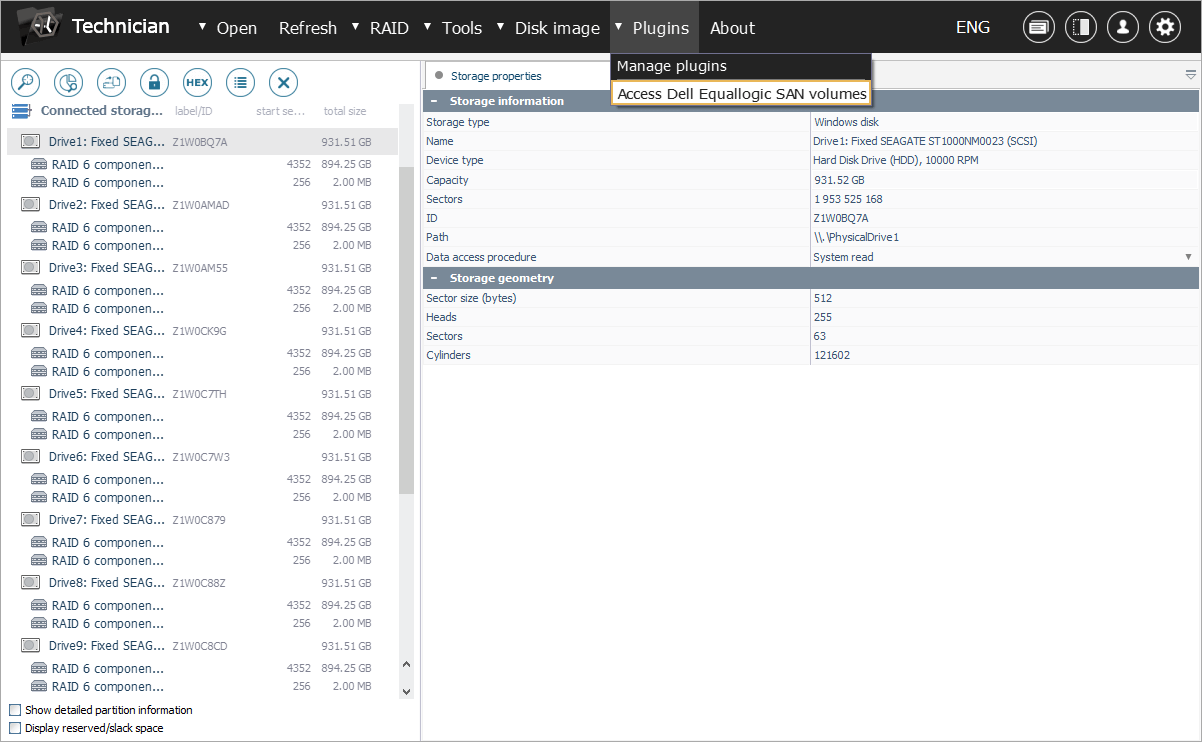
Launch the dedicated plugin to start searching for metadata associated with Dell EqualLogic SAN.
Navigate to the "Plugins" menu and select the "Access Dell EqualLogic SAN volumes" option. In the opened window, you will see a list of storage pool configurations extracted from the SAN’s superblock. Choose one of them to proceed.
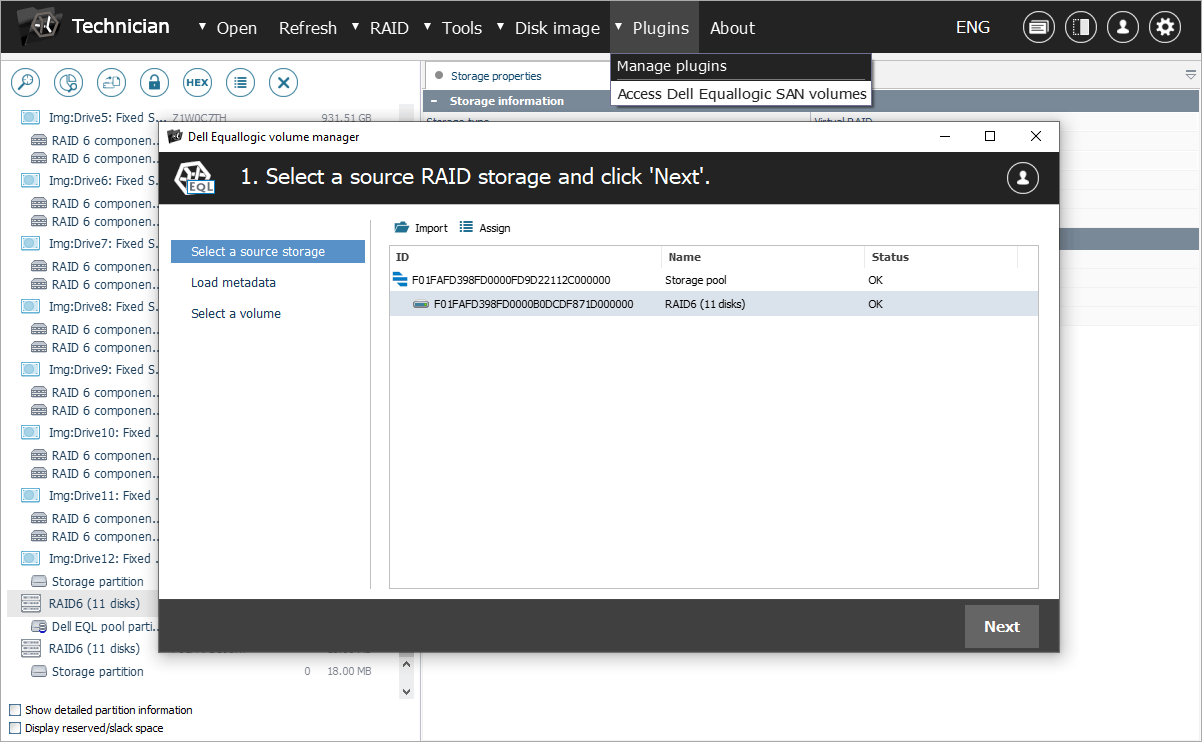
Please note that if there are multiple RAID sets in the configuration, the plugin will automatically construct a span from them based on the information extracted from the superblock.
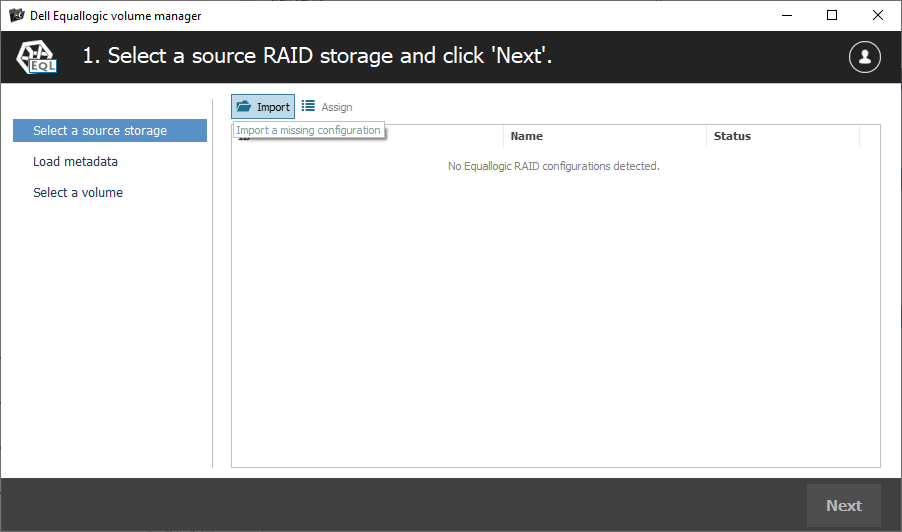
If the superblock is lost for any reason, you can attempt to locate it manually and provide it to the plugin. The program will then import the storage pool configuration and resume the process. Yet, if the storage pool RAID is already assembled correctly, loading of the superblock can be skipped.
-
Review the identified metadata versions and check their state. After that, select the appropriate version from the list, or, if required, provide the metadata block manually.
The plugin automatically recognizes essential metadata required to load the list of volumes and their parameters.
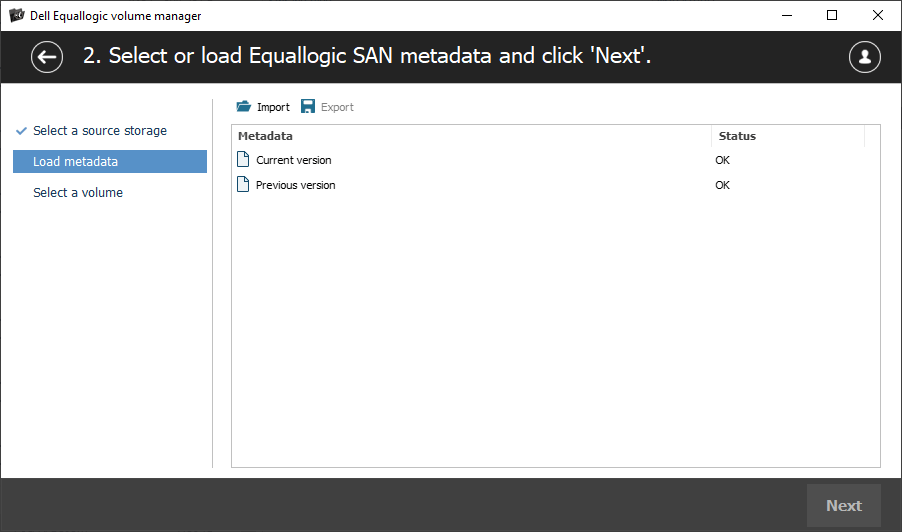
However, in the event of volume damage, this metadata may also be affected. In such cases, manual intervention is necessary to locate and provide the metadata block to the program.
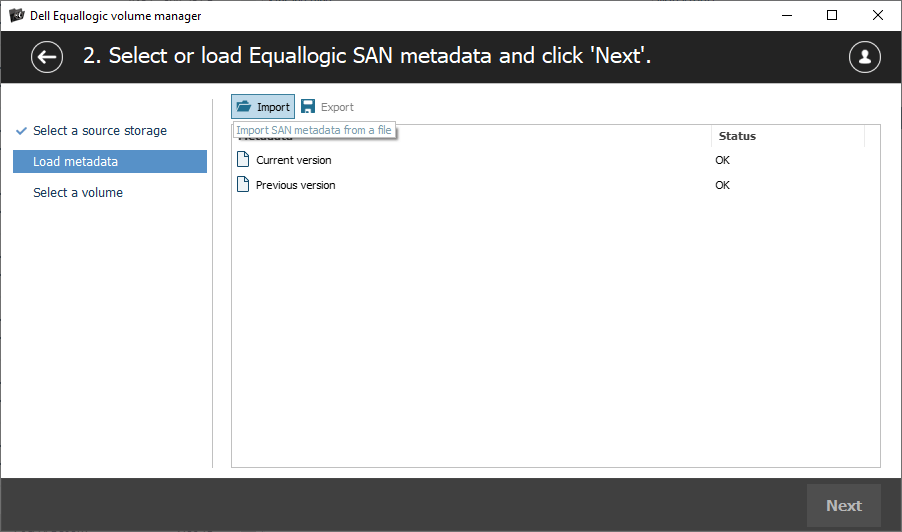
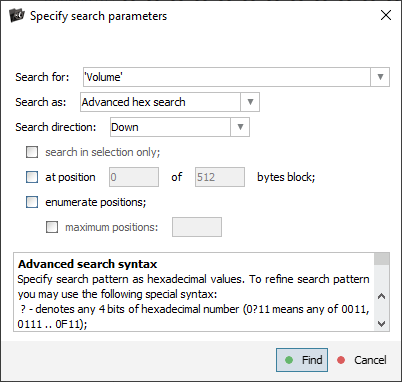
The metadata block can be found using specific keywords. Each metadata sector begins with nine bytes indicating the version number and sequence number of that sector. The program requires all metadata sectors, but without any extra data at the end.
This method can also be used to load other versions of metadata, for example, to attempt to restore deleted volumes. Once the metadata is successfully imported, the process can be continued as usual.
-
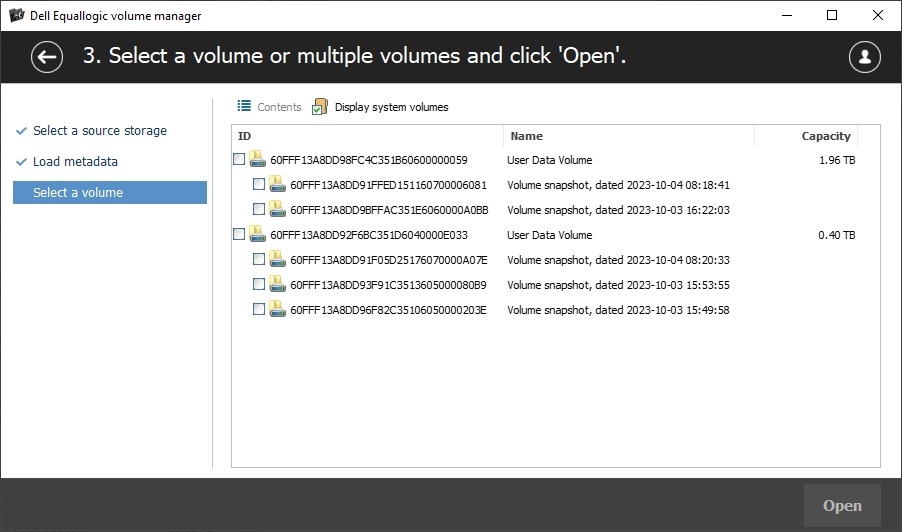
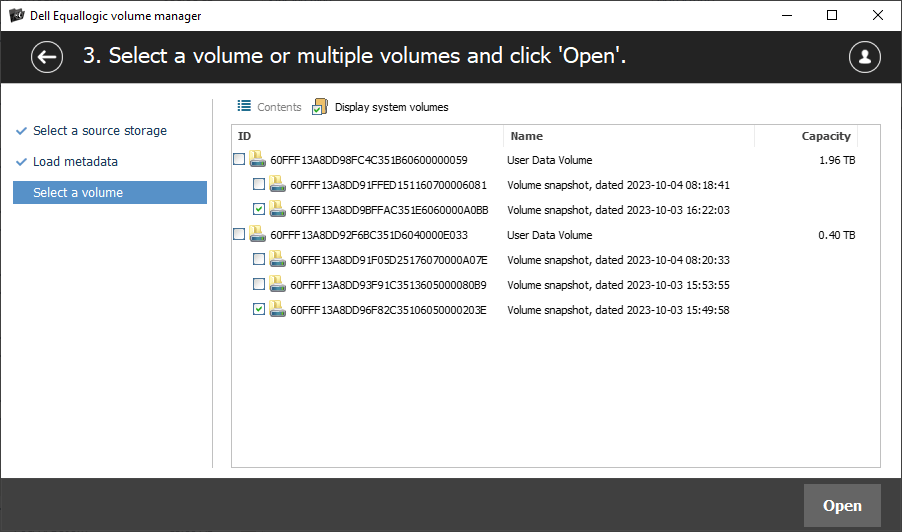
Examine the list of reconstructed SAN volumes and assess their content.
Upon success, the plugin presents a list of volumes and their snapshots, without names, but with the size information. Furthermore, the program offers a preview function that enables you to explore the file system within each volume. This makes it possible to evaluate their state and confirm the presence of recoverable data.
-
Choose all the volumes that look relevant, then click the "Open" button to mount them in the program's interface for further operations.
On condition that the plugin's license has been activated, the selected volumes will appear in the list of storages and become accessible for actual data recovery manipulations, including scanning or copying.
Dell EqualLogic SAN recovery in a video guide
You may also learn the ins and outs of the Dell EqualLogic SAN recovery process by watching our dedicated video tutorial:
Last update: August 05, 2024