How can one recover data from a desktop or laptop PC?
Dependence on computers is clearly part and parcel of being a modern man. Yet, tending to place too much reliance on these devices, sooner or later we come up against the loss of critical files. Hardware malfunctions, software crashes, malware infections and casual human errors can make the crucial information stored in the internal memory of a PC or laptop inaccessible, corrupted or deleted from the drive. But, fortunately, in most situations, there are still ways to cope with the consequences of such a data disaster or at least minimize them.
Factors affecting the possibility of successful data recovery
In the main, the possibility of data recovery from the computer's internal storage is influenced by a number of factors:
The more actively this storage device has been used thereafter, the higher likelihood is that the missing files were replaced by some other ones (i.e. overwritten) and thus got permanently destroyed. In view of this, it is strongly recommended to terminate any activities with the storage except the ones targeted directly at data recovery.
Files deleted from SSDs usually cannot be restored because of the TRIM command. It is activated by default in most modern drives and wipes their content for the purpose of improved performance and longevity of the device. Hard disk drives (HDD), on the other hand, are rather fragile and have a propensity to fail during the recovery procedure, especially when being mishandled. For this reason, special measures must be taken to protect them from hits, power surges and vibrations, and ensure their proper cooling.
File shredding or erasing utilities as well as low-level formatting carry out overwriting operations. By writing zeros or certain data patterns over the previously stored files, they generally leave no chances for the retrieval thereof. In other cases, the information usually remains on the drive until overwritten by the system, users or applications, and can be recovered with the help of a dedicated program. Nevertheless, the quality of the data recovery result will depend on the type of file system which manages the storage
Encryption enabled on the drive normally doesn't prevent data recovery. However, several conditions must be met to get the encrypted storage unblocked and accessible for the recovery program. First of all, at least one of the decryption options must be still available (encryption key, password, key file, etc.). On the other hand, the area on the disk containing critical decryption metadata must remain intact or at least must not be severely damaged. In the opposite case, it is virtually impossible for any data recovery software (and for any other program or even operating system) to access the information on the encrypted storage and retrieve or restore it.
If the storage medium has any signs of physical failure, do-it-yourself data recovery usually makes no sense and may even lead to more serious damage to the data contained within the defective drive. Therefore, please pay attention to the following symptoms that may indicate a sort of physical damage to your data storage medium:
-
a drive is not recognized by the operating system and does not appear in BIOS;
-
an HDD emits unusual noises that it has never emitted before;
-
the OS detects the drive with an incorrect size or shows it with a name different from the one specified in the specifications of the device, etc.
Under such circumstances, it is advised to have the device handled by specialists in a professional data recovery center.
Normally, the primary storage of a PC or laptop is divided into several partitions. They are intended to isolate the operating system and program files from user data. In some instances though, the OS, applications and user files get packed into a single partition without being separated. As a rule, a partition that serves the needs of the OS is subjected to constant writing even when the computer seems to stand idle, which carries a high risk of permanent destruction of the lost data. Considering this:
-
to recover files from the system partition, one should remove the drive from the tower (case) and attach it to another computer as a secondary storage device, or run this PC from a bootable (live) USB drive, as described in the instruction accessed via the given link;
-
to recover data from a non-system partition, the same computer can be used for the procedure, provided that nothing will be saved/installed to the problem drive.
How to recover data from a non-system partition using the same computer
SysDev Laboratories offers UFS Explorer and Recovery Explorer as reliable software solutions that have proved their efficiency in numerous instances of data loss, including ones related to non-system logical volumes controlled by Windows, macOS, Linux or UNIX/BSD. Different editions of the software are available to handle various particular storage technologies that may be applied on certain partitions. The programs perform in-depth analysis of the storage in a safe read-only mode, retrieve the missing data and enable its copying to a secure local or network location.
Hint: For detailed information about the supported file systems and additional storage technologies please refer to the product specifications and the storage technologies page.
In order to get the lost files back with the help of UFS Explorer Standard Recovery, take the following steps:
-
Download and install UFS Explorer Standard Recovery to a partition that doesn’t contain the items you want to restore. Ensure that the version of the program corresponds to the operating system platform on which it will be employed.
Hint: If you have any difficulties with the installation of the utility, please refer to the installation manual for UFS Explorer Standard Recovery.
-
Prepare another storage that is capacious enough for saving all the recovered data. This may be another partition of the internal drive, any portable device connected to the PC (including an external SSD or HDD, a thumb drive or a memory card) or a network location.
-
Run the application and, if needed, adjust its settings in the respective pane.
-
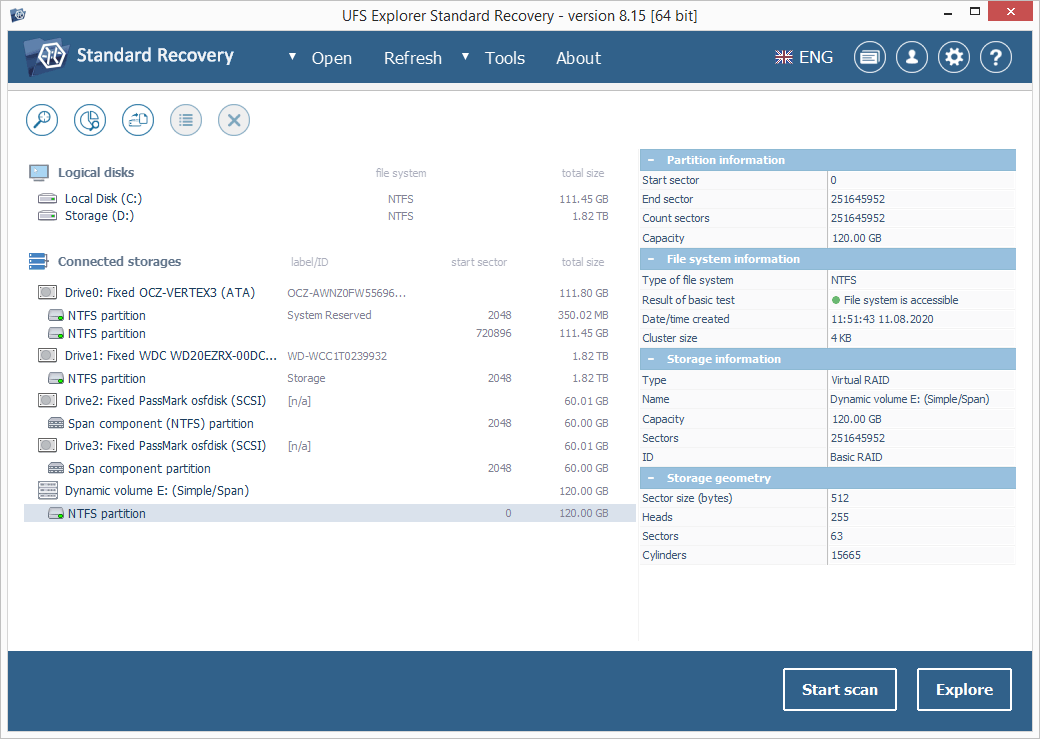
Select the affected partition in the list that will appear in the left pane of the main screen. You may rely on the size, file system and other properties to choose the correct storage.
-
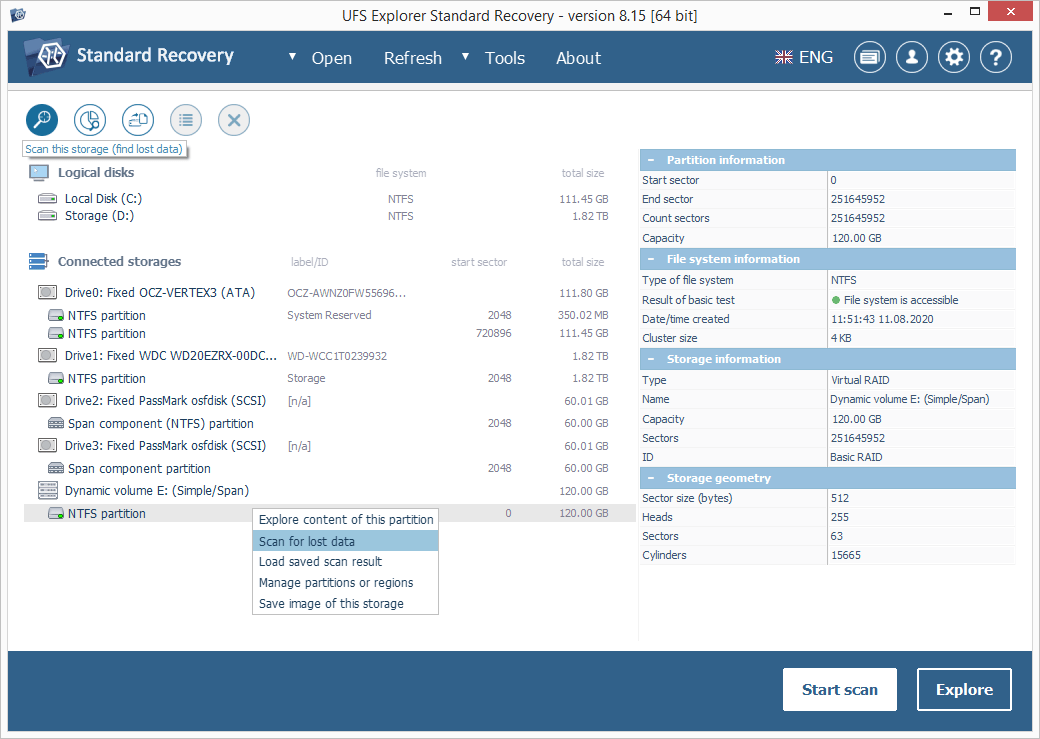
Launch the scanning procedure using the "Start scan" button or the corresponding option in the storage context menu. The program automatically decides on the optimal parameters for a scan, yet, you may modify them in accordance with your needs.
Hint: More information about configuring the scan can be found in the instruction on scanning a drive with UFS Explorer.
-
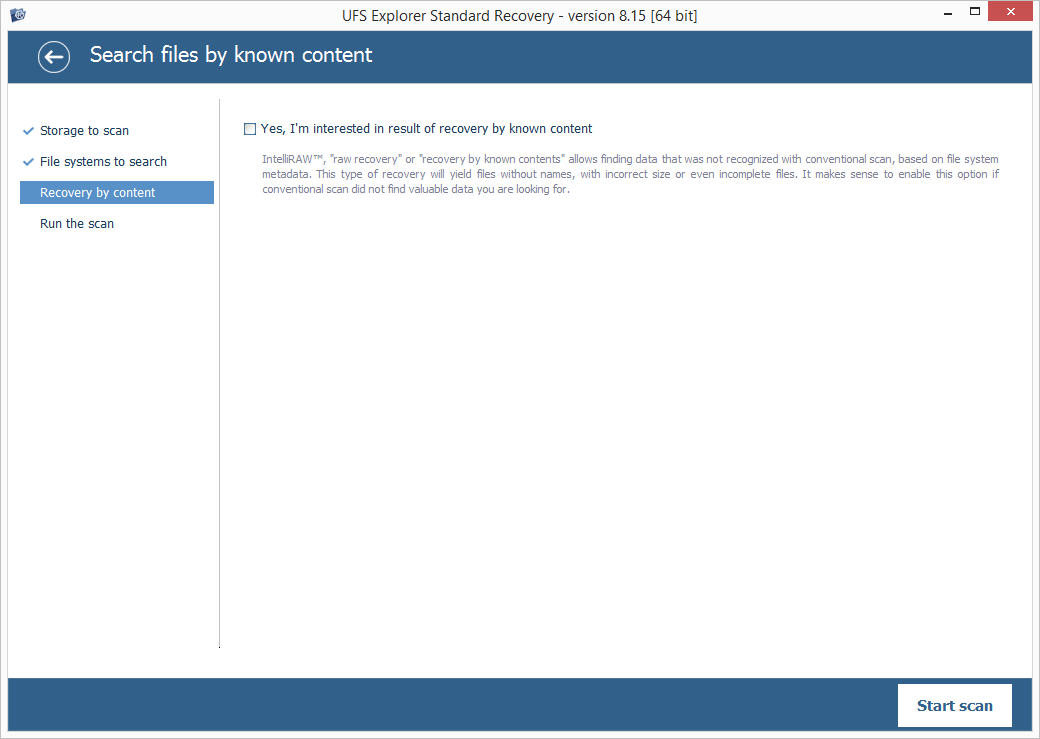
Press the "Start scan" button and wait for the software to finish off the procedure.
-
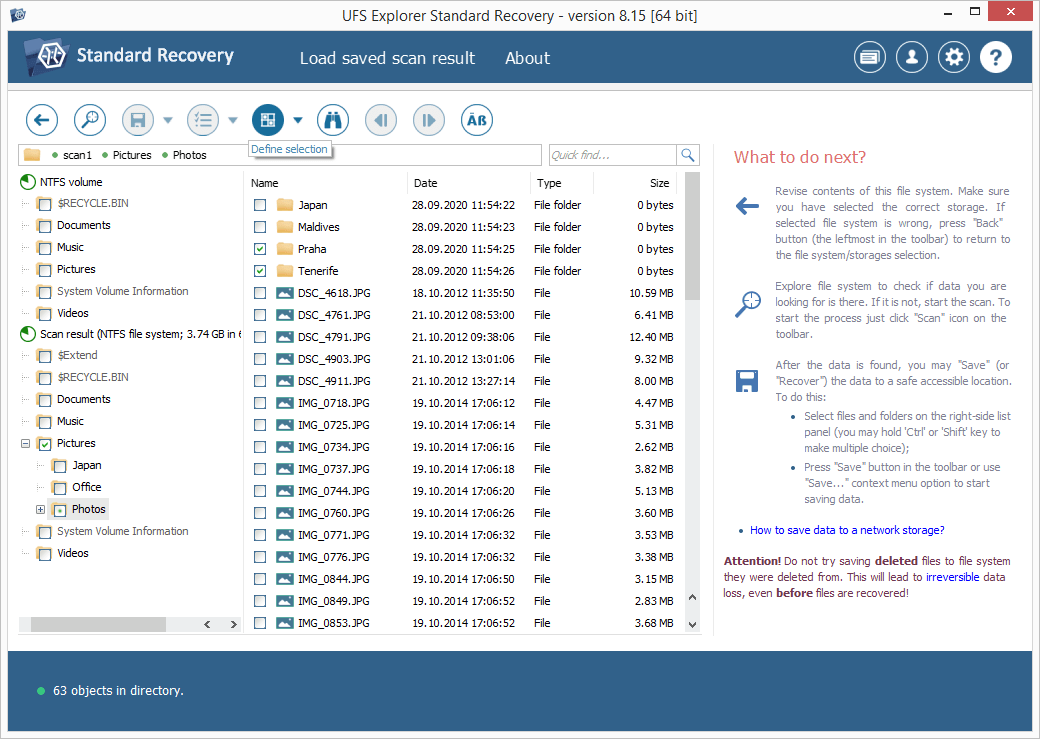
Explore the found files and folders. If the function of displaying the status of files is activated, all of them will appear with circular icons. The color of such an icon matches the file’s state: the green color means that a file is intact and its header matches the expected data of a valid type; the red color signifies a damaged (zeroed) file; a file with a gray icon may be partially corrupted or cannot be checked for validity due to the format’s specifics. The deleted files and folders can be differentiated by the red color of their names.
You may also sort the elements by name, date, size, use the quick and advanced search options as well as preview files in the internal viewer. Select the items you want to copy.
Hint: The information provided in Evaluation and saving the results of data recovery may facilitate your work with the obtained folders and files.
-
Save the chosen data to another partition, external storage or a network folder. Please watch out that you don’t set the scanned partition as a target location. Otherwise, the original information will be overwritten with the files being restored, leaving no possibility for further data recovery.
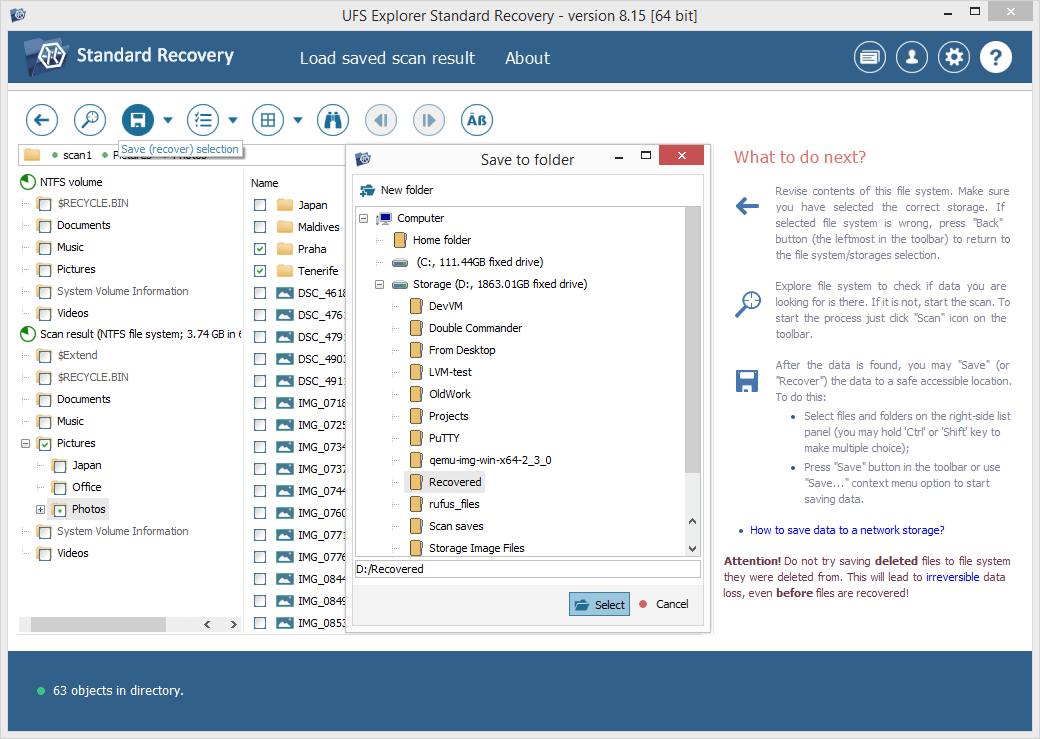
Hint: If you are going to save the recovered data to a network storage, please check the provided guide.
Last update: May 29, 2024