How to connect SATA drives to a PC using a USB to SATA adapter
SATA drives are normally designed to be mounted inside the computer, which requires opening its case and attaching them to the ports on its motherboard. However, in certain cases, this process may be too complicated or even impossible to accomplish. Using the provided guide, you can transform any internal SATA hard drive or SSD into a removable USB device with the help of a simple adapter. After that, you can easily connect it to a desktop or laptop PC via the regular USB port.
Hint: Please rely on the article on Identification of a hard drive’s interface type to aid you in determining whether your hard drive features SATA or some other type of connector.
When is it required to connect a SATA drive via an adapter?
SATA remains the most common connection standard for internal hard drives found in desktop computers, laptops, servers, and some other devices. It is represented by a smaller L-shaped connector with a flat thin cable that serves for data transmission and a slightly wider L-shaped connector used to power the drive via a 5-wire cord. The first "data" cable plugs the storage medium into the motherboard, while the second "power" cable – into the system’s power supply unit. This kind of setup is optimal and provides the highest transfer rates. Thus, it is generally preferred for data recovery as well. Yet, in some situations, the drives should be taken out of the computer, for example, due to a serious risk to overwrite the lost files, severe OS crash, faulty hardware or other technical limitations.
Admittedly, when removed from the original device, a SATA hard drive can be likewise relocated to an internal SATA slot of another computer. However, one may not want to open its tower because of the warranty. The computer may also be short of available SATA ports, since a typical motherboard can host about 4-6 of them. This method is also not viable for laptops, as they are slightly more difficult to disassemble compared to desktops and have physical space constrains. Any of these obstacles can be easily avoided by turning this SATA drive into an external device plugged into a USB port instead of the motherboard.
What should be prepared for the procedure?
The communication between these two interfaces can be achieved via a special USB to SATA adapter. Its USB side is plugged into the computer’s USB port, and the SATA side is attached to the drive. Such adapters are relatively inexpensive, and it is possible to find USB 3.0 and higher options. Yet, it must be noted that, besides the speed, they have some other limitations. Most of them do not support drives whose capacity exceeds 2 TB. Only some USB 3.0 and higher variants do work with drives up to 6 TB, this information should be available in their specifications.
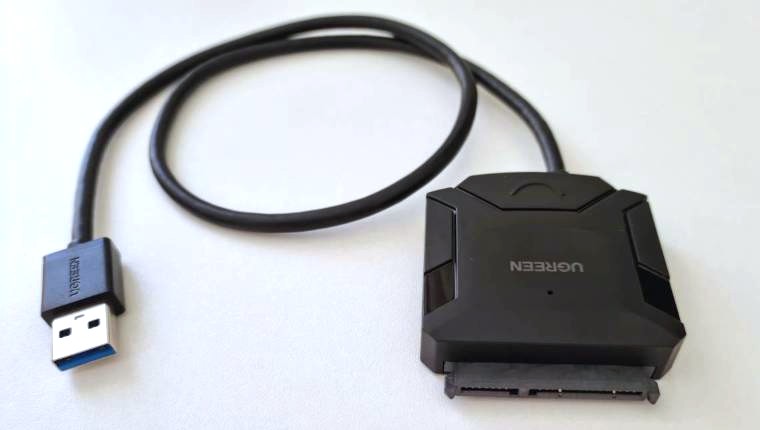
Pic. 1. USB to SATA adapter.
All SATA hard drives need electrical power to spin. Its amount depends on the size of the drive. A more compact 2.5-inch laptop version consumes less and can be powered solely by a USB port. The 3.5-inch hard drives intended for desktop PCs require more electricity. That is why they have to be connected to an external power supply, like an AC/DC power adapter.

Pic. 2. AC/DC power adapter.
For this to be possible, the USB to SATA adapter has to be equipped with an additional 12 V input port for power in which you can plug the AC/DC power adapter cable. Some manufacturers may even include the power adapter into the kit.
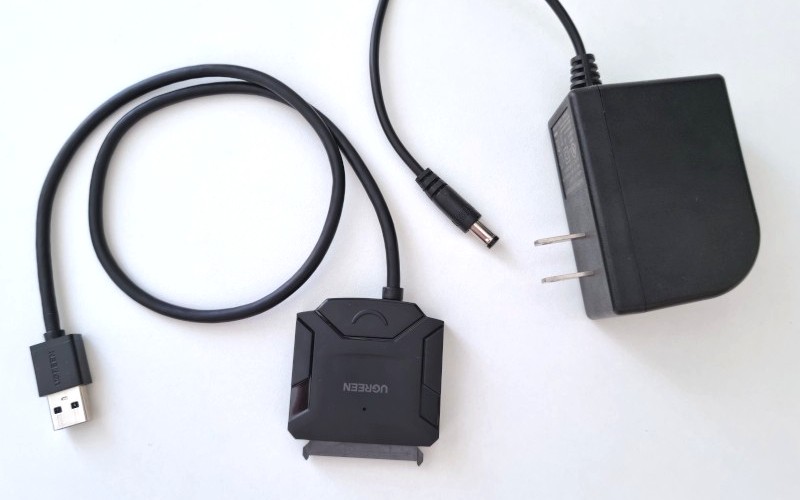
Pic. 3. USB to SATA adapter with an included power adapter.
Another important issue is proper handling of the drive. These devices are quite easy to break, so precautions must be taken that the drive doesn’t get damaged in the process. The storage medium should be placed strictly horizontally and on a flat surface. Its sides must remain ventilated, thus, you may want to use a USB-powered fan or some other cooling appliance.
Connecting SATA drives via a USB to SATA adapter step by step
Having prepared a USB to SATA adapter, and, if necessary, an additional power adapter, you may start connecting your drive.
-
Attach your SATA drive to the USB to SATA adapter.
Plug your SATA hard disk drive or SSD directly into the combined SATA connector on the adapter.
-
Power the adapter if you have a 3.5-inch hard drive.
Insert the connector that comes from the AC/DC power adapter cable into the dedicated power port on the USB to SATA adapter. After that, connect the power adapter to an electrical outlet.
-
Connect the USB to SATA adapter to the PC.
Attach the cable with the integrated USB plug that goes from the adapter to a vacant USB port of your computer. It is preferable to use one located directly on the computer’s motherboard. Such ports can usually be found on the rear side of the tower.
-
Check the drive.
If there is a switch on the USB to SATA adapter, turn it on, and wait until the drive boots. Listen to its start and initialization: there shouldn’t be any strange sounds, like clicking or grinding. If the drive doesn’t make any noise, this may indicate electronics failure.
Hint: The peculiarities of work with damaged digital media are described in detail in How to recover data from a defective disk.
-
Ensure that the drive is detected.
The computer should detect the adapter and install the necessary drivers. In case of success, the drive will be displayed in Disk Management.
Hint: If the connected drive has a RAW or uninitialized status, please, familiarize yourself with the article covering the issue of a RAW partition/drive.
To learn more about other possible installation methods, please, refer to the article devoted to choosing a method for connecting SATA drives to a computer.
Last update: November 15, 2022