How to connect SATA hard drives to the motherboard of a computer
In some data loss situations, like in cases of an OS crash or accidental deletion of files from the system partition, it is highly recommended to take the hard drive out of the affected computer and plug it into another PC for recovery. As the SATA interface remains prevalent for the connection of hard disks in modern systems, at least basic technical skills will suffice to carry out the procedure. Follow this guide to connect your SATA drives directly to the internal slots on the motherboard of the computer.
Hint: Please rely on the article on the identification of a hard drive's interface type to aid you in determining whether your hard drive features SATA or some other type of connector.
Warning: The recommendations presented in this article assume that you have adequate skills in handling hardware. Improper actions may result in physical damage to the drive and permanent data loss.
When is it possible to connect a SATA drive directly to the mainboard?
Installing a SATA hard drive to the internal slot on the motherboard is often a better solution than using external adapters or enclosures that are rather costly and notably restrict the data transfer speed. Besides, such drives are comparatively easy to set up, even for non-experts. However, there are a few important things you should consider before picking out this method of connection.
First and foremost, ensure that the case of your computer provides enough space to mount the required number of drives. This will be a serious obstacle if you take a laptop, as most of them do not have bays to fit even a single additional internal drive. That is why it will be much more viable to use a desktop computer, preferably a full-tower one. Apart from that, the drives have to be seated properly to prevent any damage to them and enable their adequate operation. Also, in view of the fact that they produce much heat, you need to take care about their ventilation. You shouldn't pile them up or leave them hanging on their cables, as this is likely to cause their breakdown and further data loss.
Secondly, find out if there are spare SATA ports to plug the drives in. On average, a mainboard can host between 4-6 L-shaped SATA ports, but the largest ones may offer up to 8 sockets. You may perform its visual check or refer to the technical specification provided by the manufacturer. The number of vacant SATA ports must coincide with the number of drives you are going to attach. At the same time, you should mind that some of the slots are probably occupied by the existing hardware. If the motherboard lacks enough ports or doesn't support the SATA interface at all, consider upgrading it with an expansion card, which is another method of connection described in a separate article.
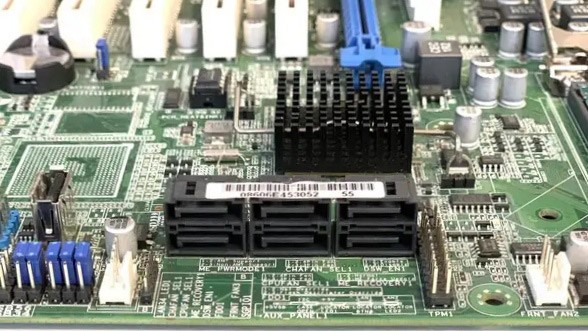
Pic. 1. SATA ports on the motherboard.
Furthermore, all hard drives consume power directly from your system's PSU. Though they do not require much, under 15 watts per drive, you need to make sure that you don't overload the power source, especially if you have any power-hungry components, like a high-performance graphics card. If pushed beyond the limits, the PSU may suffer an unexpected shutdown, so try to keep its power load under 80%-90%. If possible, disconnect some unnecessary devices or opt for another method that involves an extra power source, for instance, a USB to SATA adapter or an external drive enclosure.
On top of that, interference with the internals of equipment under warranty may lead to its breach, for example, when you damage the warranty seals. If your PC is still under warranty, it is advisable to use external methods of connection, like a USB to SATA adapter or an external drive enclosure. Despite reducing the speed of connection, they will keep the warranty in effect.
What should be prepared for the procedure?
Before you start installing your storage device, make certain that you have all the necessary equipment utilized in the process.
To begin with, prepare a sufficient number of cables. Any SATA hard drive has two L-shaped ports: the smaller one is for data connection, while the wider one is for power. Thus, you need two cables per each SATA drive:
-
A SATA data cable is flat, typically red-colored, with small identical 7-pin connectors on each end that have recognizable L-shaped notches. The connectors may be straight or angled to 90 degrees, some of them have metal retention clips. This cable is used to attach the drive to a SATA port on the motherboard. Depending on the package, a motherboard may be supplied with 2-3 SATA cables, but, perhaps, you may need to purchase them separately.
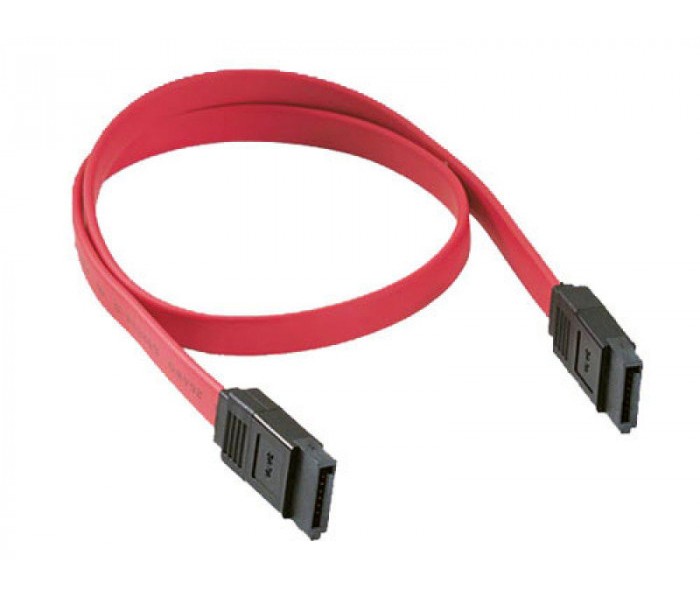
Pic. 2. SATA data cable.
-
A SATA power cable comes out of the PSU and has a larger 15-pin plug with a similar L-shaped key. It usually consists of five wires that may be colored or black. If there are too few power sockets, you can buy a SATA power splitter that can provide 2-5 additional connectors. In case you have a 4-pin Molex cable instead, you will need a Molex to SATA converter.
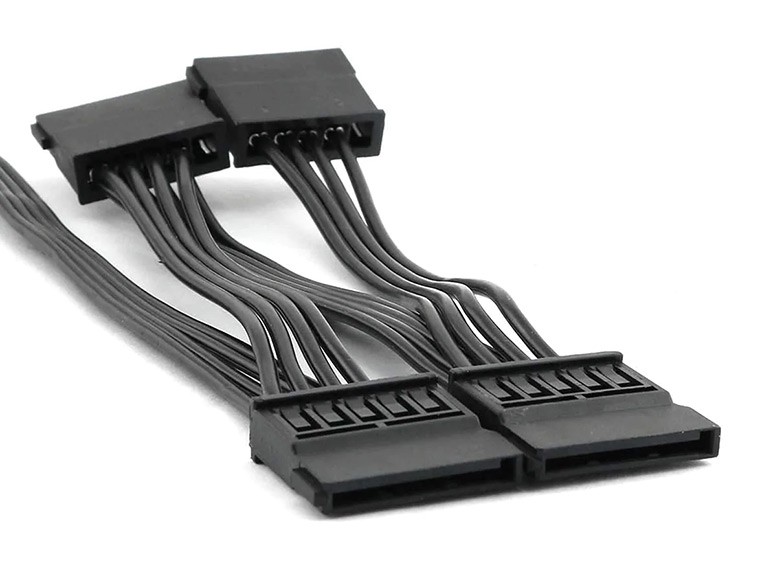
Pic. 3. SATA power cable.
Secondly, since you will need to work the computer's inner parts, prepare the following tools:
-
A Phillips-head screwdriver to open up the case and suitable mounting screws for the drive. Use only short screws, as longer ones may severely damage the drive.
-
An anti-static wrist strap that will help you protect your hardware from an unexpected static shock. As an alternative, you may ground yourself by touching a metal object to discharge static electricity.
In case you have a 2.5-inch hard drive, you might need a special 2.5 to 3.5 drive bay adapter to be able to insert it into your computer's the drive bay. However, some assemblies may already contain 2.5-inch bays, so it is recommended to consult the documentation of your PC first.
Connecting SATA drives to the motherboard step by step
The following steps are suitable for installing both SATA HDDs and solid state drives, considering that they normally have the same connectors.
-
Power the computer off.
Shut down the system and turn off a switcher on the back panel of the system unit. If such a switcher is missing on the case, just unplug the tower. It is also recommended to hold down the power button for several seconds to discharge the remaining electricity.
-
Ground yourself.
The electronics of the drive and other hardware components are extremely sensitive to static electricity and can be damaged by an electrostatic shock. To discharge it while working with the computer's internals, wear a special anti-static wrist strap or just touch the metal part of the tower if it is plugged into a grounded socket.
-
Disassemble the case.
Once the computer is turned off, you can open the system unit by removing the screws on the back panel that hold the side panel. Modern cases usually have thumbscrews, while older ones may require using a screwdriver. Pull the side panel and put it away to obtain access to the interior of the case.
-
Insert the hard drives into the bays.
Find an empty bay for each hard drive. Their positioning and orientation may vary depending on the design of the case. In the first place, look for them at the lower front, but it will be better to refer to the manual for the exact location. Once discovered, slide the hard drive into the bay, until the screw holes on the drive align with the holes in the bay. Be careful and do not apply pressure, as the drives may get easily damaged. Also, make sure that the SATA ports on the back of the drive remain accessible. After that, you can secure the drive inside the bay with screws (or tool-free fasteners).
-
Connect the drives.
After that, you can attach each of the SATA hard drives with the help of a power cable, which connects it to the computer's power supply, and a SATA data cable, which connects the drive to the motherboard. First, insert the SATA data cable into a SATA port on the motherboard (as a rule, such ports are labeled and grouped together). If there are SATA of different versions, use the latest one. Also, pay attention to the specific notches, they have to be aligned with the respective keys. Secondly, find a free power cable and connect it to the wider connection port of the HDD. Thirdly, insert the SATA data cable into the smaller SATA port on the hard drive. Repeat the procedure if you have multiple drives.
Note: The absence of SATA ports on the motherboard means that it does not support the SATA interface. In this case, you may use an expansion card or attach an IDE to SATA adapter to the connector of the older IDE standard. If the number of SATA ports is lower than you need, use another method of connection with the help of a USB to SATA adapter or an external enclosure. In case there are too few power cables, you may use a splitter.
-
Check Disk Management.
Once the drives are connected, you can power the computer back on and boot the system. To check whether the drives are attached correctly, you can run the Disk Management utility and look for them in the list of devices. If the drives are not available there, shut down the computer, unplug it and check the contacts.
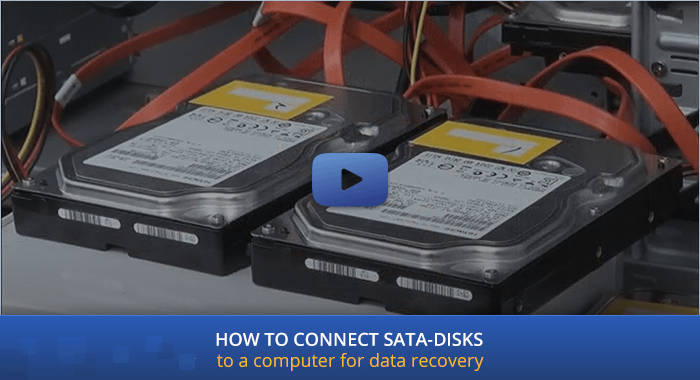
A video-guide on connecting SATA drives to the motherboard
The following video demonstrates the entire process of connection:
To learn more about other possible installation methods, please, refer to the article devoted to choosing a method for connecting SATA drives to a computer.
Last update: November 15, 2022